The Camping Air Conditioner

air conditioner for camping

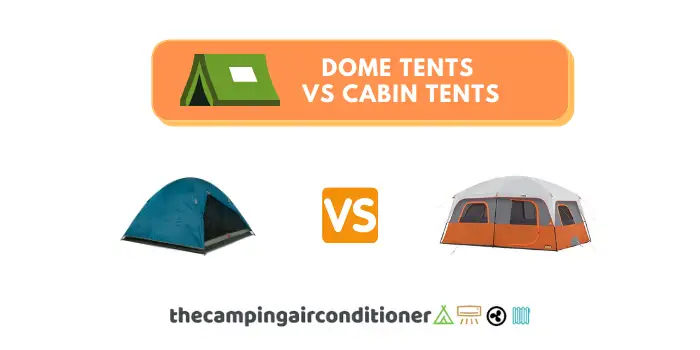
Dome tents vs Cabin tents – Which one you should pick?

There is a wide range of tents in the market today. They vary according to their size, fabric, ability to handle weather conditions, and many other factors. Another crucial aspect you should consider before buying your next shelter is its shape. Apart from aesthetics, it can heavily influence your camping experience with it.

We have been asked this question many times: Which tent shape should I pick – a dome tent or a cabin tent? Our answer to this question is: it depends on some factors such as:

  • Camping conditions (rainy/windy x sunny conditions)
  • Desired space and portability (backpacking x family camping)
  • Price
  • Ease of setup
  • Preferred tent height 
dome tents vs cabin tents

dome tent usually works better for backpackers, casual campers and smaller groups who are after easy setup features. Overall, these tents perform better in rainy and windy conditions and are cheaper.

On the other hand, a Cabin tent offers plenty of room to accommodate you and your family. Some of them even come with room dividers, increasing privacy. Because of their structural arrangement, they tend to be bulkier, which translates into more expensive models. 

Dome tents vs Cabin Tents - which one should you pick?

TL;DR – We have prepared a table that summarises which tent you should pick according to your requirements. For more details, keep reading the article and the FAQ section below.
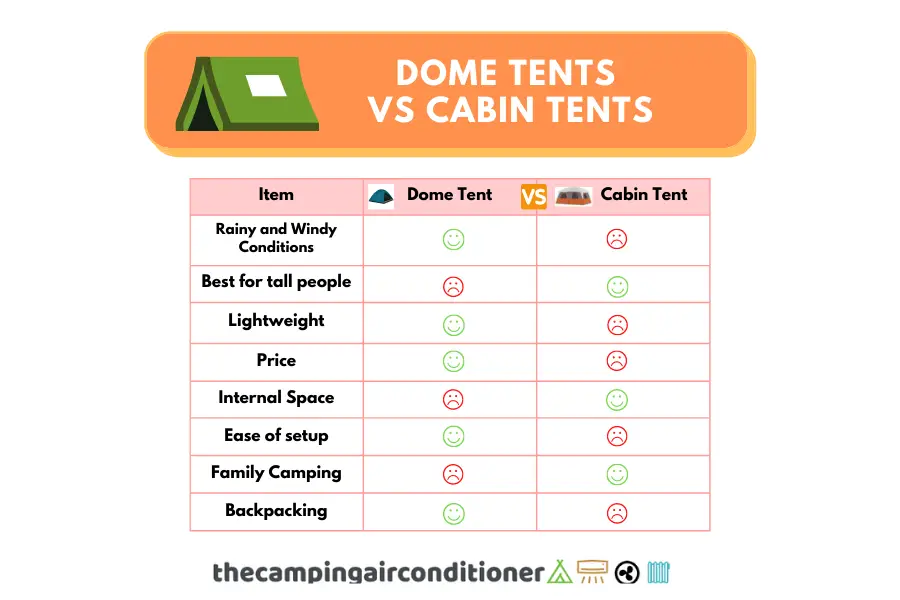
dome tents vs cabin tents - comparison

What is a dome tent?

Dome structures were created around 100 A.D. by Roman engineers and architects. It is believed that the first dome structure was built in the Pantheon (Rome, Italy). Among the advantages of the dome as a structure, we can highlight the following: increased stability, use of less material, improved aerodynamics to deal with wind loads, and great aesthetics.

Because of these benefits, dome tents are probably the most common existing tent shape. It usually comprises flexible-curved poles that meet at the tent’s centre based on a square floor, providing a natural dome shape. 

dome tents vs cabin tents - pantheon
Pantheon (Rome, Italy)

Dome tent

Advantage of dome tents

The advantages of dome tents are numerous:

  • It usually is a lighter tent because of its shape and structural benefits (it tends to use less material).
  • Since it uses less material, it tends to be cheaper. 
  • Dome-shaped tents are known for their stability and better aerodynamics, resulting in better performance during rainy and windy conditions.
  • They can free stand without stakes
  • Easy setup, disassemble and pack with plenty of pop up tent options.
  • Ideal for backpacking and hiking adventures

Disadvantage of dome tents

Some of the disadvantages of dome tents are detailed below:

  • The taller the dome tent, the more unstable it will be 
  • Not ideal for large groups
  • Sloped walls reduce standing headroom 

What is a Cabin tent?

Conversely to dome tents, the cabin models have straight walls and look like an ancient house with a cubic shape. Sometimes called wall tents, they tend to be heavier as they require more material and structure to become stable.

Their design provides campers with more space and headroom for movement, ideal for family or luxury camping (glamping). On the other hand, a drawback of this model is its poor aerodynamic performance, meaning that you might struggle with cabin tents during rainy and windy conditions.

Advantage of cabin tents

In short, the advantages of cabin tents are:

  • They provide you with plenty of space and headroom. 
  • Some big tents even come with room dividers, which is great for privacy
  • Ideal for tall people and family camping
  • They usually have higher durability

Disadvantage of cabin tents

Among their drawbacks, we highlight:

  • It usually takes more time to set up, disassemble and pack (even though there are instant setup options these days). 
  • They use more material, and, therefore, tend to be more expensive
  • Poor aerodynamics, with bad performance in rainy and windy conditions

FAQ

Which tent should I buy - a dome tent or a cabin tent?

As previously discussed, it depends. Both come with benefits and drawbacks. We recommend cabin tents for family camping and those after more room.

Pick a dome tent if you are keen on more versatility and easy set-up.

Which tent is better for windy conditions - dome tents or cabin tents?

Overall, dome tents tend to perform better in windy conditions because of their shape. There is a caveat, though – dome tents will become more unstable as they become taller.

Which tent is better for rainy conditions - dome tents or cabin tents?

Dome-shaped models help rainwater flow, ensuring better performance under rainy conditions.

Suggested Article
hacks for camping in windy conditions

We all have been in this situation – out of the blue, a wind load of more than 50km/h reach our campsite. Our tents start

Read More »

Which tent is better tall people - done tents or cabin tents?

For more space and headroom, choose a cabin tent.

Which tent is more suitable for backpackers - dome tents or cabin tents?

Dome tents usually are smaller, lightweight, compact and easy to set up. Therefore, if you are a backpacker, hiker, or are camping in smaller groups, choose dome-shaped models.

Which tent is more suitable for family camping - dome tents or cabin tents?

Lorem ipsum dolor sit amet, consectetur adipiscing elit. Ut elit tellus, luctus nec ullamcorper mattis, pulvinar dapibus leo.

Is it possible to fit an AC in these tents?

Yes. You can fit an tent air conditioner in all these tents. However, we understand that mini ac will suit better dome tents, whereas window ac or portable ac units will suit better cabin tents. 

Is it possible to use a heater inside these tents?

Yes. There is no problem in using a tent heater inside a dome or cabin tent. However, you should always pay attention to the following safety measures:

  • Ensure that you have a carbon monoxide detector in place
  • Make sure that there are overheating and tip-over auto-shutoff mechanisms 

Suggested Article
are propane heaters safe in a tent

Camping can be a lot of fun, but if you’re not prepared for the cold, it can be miserable. Even in the summertime, it can

Read More »

Verdict

As you have seen, the choice between dome tents and cabin tents will rely on many factors, such as:

  • Camping weather conditions
  • How big your camping group is
  • The need for space
  • Your budget.

There is not a better or worse option, but only the one that will suit you better. We hope this article has helped you wish you a happy camping trip!


 

Is hiking a sport? Discover here…

Who doesn’t love going for a good hiking session while camping? We love it, and, to be honest, it is one of our main reasons – being in touch with nature and breathing fresh air.

More recently, I’ve been inquired by a friend – “Is hiking a sport?” and for me, obviously it was. However, some people think differently! 

Technically speaking, the classification of hiking as a sport or not will rely on the definition of the term “sport”.

For example, the Cambridge dictionary defines sport as: 

“A game, competition, or activity needing physical effort and skill that is played or done according to rules, for enjoyment and/or as a job”

Oxford Dictionary refers to the sport as

“An activity involving physical exertion and skill in which an individual or a team competes against another or others for entertainment”

So, is hiking a sport?

Short answer – No, hiking is not a sport! To be classified as a sport, hiking would need to be competitive and with a complete set of rules, which is not the case. 

Even though it involves physical activity, hiking is not a game to be played, but a leisure activity to enjoy nature. Therefore, no, hiking is not a sport. 

Let’s have a look in detail into the arguments pro and against hiking as a sport below.

is hiking a sport

The arguments against hiking as a sport

To expand the arguments against hiking as a sport, let’s first review the hiking definition: “the activity of going for long walks in the countryside” (Cambridge dictionary). 

Therefore, we can see some gaps to match the sports definition requirements, such as:

  • Lack of competition
  • Lack of Rules 
  • Lack of Entertaintment 

Argument 1 - Lack of competition

As previously discussed, hiking is more inclined to personal pleasure and recreational activities rather than a competition. It usually involves long walks with no clock timing or pressure.  

However, many argument that this is not true, given there are a few hiking competitions around the world

On the other hand, sports are widely known for its competitive nature and desire for win, which introduces a set of rules and regulations to manage its practice, as detailed below. 

Argument 2 - Lack of Rules

There are no real rules or regulations to dictate hiking practice. 

You only need proper hiking gear, a pair of comfortable hiking boots, a bunch of friends, and that is it – you are ready to go!

Sports are governed by a well-defined suite of rules, which sometimes even includes tribunals for investigation and judgement of players. 

Argument 3 - Lack of Rules

Hiking is not really an entertainment activity – you cannot find live TV broadcasting of an outdoors session. 

Even though some TV programs and youtube channels are exclusively made for hiking, they do not draw as much attention as soccer competitions, Formula 1 Grand Prix, and basketball matches, for example.

The arguments in favor of hiking as a sport

Some hiking lovers have different options and strongly believe that hiking must be classified as a sport. Their arguments are based on the following points:

  • The Need to be skilful
  • Physical Exertion
  • Hiking Challenges

Argument 1 - The Need to be skilful

As with all sports, there is no doubt hiking demands skills and abilities, such as:

  • Ability to plan routes and to read maps 
  • Ability to read different terrain conditions and adapt the hiking approach
  • First-aid skill (essential in case of an accident)
  • If required, the ability to cross water flows
  • Experience to deal with different weather conditions
  • Leadership
  • Many others

Argument 2 - Physical Exertion

Hiking requires a lot of physical effort! You need to be fit and prepare your cardiovascular system to attack hilly terrain and handle long walks at high altitudes. Your legs might be broken after a long session, even if you are a gym rat.

From this perspective, I dare to say that there is no real difference between hiking and sports. Both require commitment, discipline, and physical efforts if you want to step up and evolve as a practitioner.

Argument 3 - Hiking Challenges

Even though competitions are rare, there are several hiking challenges worldwide. 

Snowandrock.com has prepared a list of the five most challenging hiking trails in the world, which includes:

  • Pacific Crest Trail (US) – This trail spans more than 4000km from the very southern areas of California (Border with Mexico) up until the Canadian-US border. 
  • Welsh 3000s (Wales) – It comprises a 42 km trail, and on ordinary people, it takes 24 hours to complete. Located in Wales, it includes 15 mountains with heights over 900m.
  •  Overland Track (Australia) – Located down under, the Tasmanian 65 km trail goes through different national parks and have peaks above 5,300 feet.

FAQ

Are there hiking competitions?

We have already seen multiple hiking challenges but no real competitions. If you are after a sport with similarities, we recommend practising trail running

Bottomline

Regardless of being a sport, hiking is a great and fun alternative to being in touch with nature, keeping fit, and socialising. We love the recreational opportunities provided by hiking, and we will always practice it, independent of its status!

How cold is too cold for camping?

Camping in winter has its benefits. There are fewer crowds, bugs, and silence because birds have left for the season. Winter camping is a peace you achieve by deciding to sleep out in the cold nights in all their fabulous, painful glory. However, it can be freezing and challenging if you are not well prepared.

A natural question that arises is – how cold is too cold for camping? Camping records show that people can camp in temperatures as low as minus 70 Fahrenheit. However, if you are not a very seasoned winter camper, we advise you not to risk yourself with temperatures below the 30-40 Fahrenheit (around 0-celsius degrees).

how cold is too cold for camping

To make sure your winter camping adventure is successful and comfortable, you must be well prepared. You should learn some cold weather camping hacks and have special cold weather camping gear. 

Let’s detail our tips and suggestions for cold weather camping in this guide to ensure you have an excellent outdoor time in winter.

How cold is too cold for camping

Well, this can be a tricky question. After all, many campers have camped in the Arctic and Antarctic. So, you can camp in temperatures as low as minus 70 Fahrenheit degrees, provided you are well prepared. Having the following camping gear will help you, such as: 

If you want an exact figure for an average camper, temperatures between 30 and 40 Fahrenheit are considered already as cold weather camping. It might become already dangerous at this range if you are not prepared or not experienced enough to handle the harsh climate.

Challenges of cold weather camping

Unpredictable rain

In the winter, rains are unpredictable and often happen at 30-degrees F. Dealing with the rain makes your adventure much more difficult because temperatures tend to fall to a lower degree. To avoid getting soaked in the rain, check the weather forecast before your camping trip and bring enough gear for cold weather camping.

Extreme winds

In cold weather camping, you must experience extreme winds, which are mostly expected at a temperature below 40-degrees F. To worsen, the windchill effect can drop the temperature feel even more!

Avoid being exposed to cold air in the extreme wind because it may cause frostbite or hypothermia. When it is windy, keep checking your tent now and then to ensure safety, and check whether you can find a natural windbreak structure.

Other articles that might interest you

Condensation

During any camping season, the tent gets warm due to your presence and any heating source you are using. 

The temperature difference between the inside and outside create water vapors. These particles might condense on the inside of the tent’s wall.

Condensation can make your tent completely cold because of the ice forming on the walls, making winter camping more challenging.

Extra weight on your gear

If you are going to cold camping, you will need extra gear like sleeping bagswarm clothing layerslinerspads, etc. 

Other than that, you might have camping gear in your backpacks, such as a propane heater or space heater. 

Unfortunately, if the gear gets wet, you will struggle to carry it, and you can be left without proper warming clothes.

Cold weather camping hacks

You can do multiple things to ensure you are comfortable in cold weather. The tips will help you stay warm even when it is freezing. Here are essential tips you should remember when going to winter tent camping:

Hack 1 - Choose the right location

Where you pitch your tent is essential. Sometimes, getting the perfect spot can be difficult, and options are always limited. 

However, always look for a location that provides enough protection from the weather. For instance, camping under trees or on the leeward side of a ridge will give enough protection and reduce exposure to wind, rain, and cold.

Hack 2 - Pick a 4-season tent

If you decide to go camping during the winter season, make sure you have a tent built for cold weather camping. 

Most options are designed to be 3-seasons. These tents are okay for spring, summer, and fall, but you will need something much stronger for winter. 

Whilst the name 4-season tent  might induce you to think that they are prepared for the four seasons, these models were developed for cold weather camping. Usually, a 4-season tent is made of durable polyester or nylon, and it doesn’t have mesh, which might increase tent condensation.

Our 4-season tent recommendation

This tent has outstanding temperature regulation and insulation features whilst still having a straightforward setup arrangement. All in all, it is an excellent choice for cold weather camping.

Hack 3 - Wear warm clothes

Always wear clothes that keep you warm when you are inactive. You release more heat during your backcountry trek, but it becomes hard to maintain the heat once you stop moving.

So, it will be good to layer up with thermal clothes. Wear waterproof jackets that don’t get wet quickly and a coat that retains heat faster. Furthermore, you can wear a pair of waterproof and well-insulated boots to keep you warm, prevent frostbites, and use a balaclava to protect your face.

Hack 4 - Avoid using wet sleeping bags

When they are wet, sleeping bags don’t retain heat, especially those made with down. A wet sleeping bag is terrible for cold weather camping. It will help if you use a sleeping bag made with water-repellant down or synthetic materials that will keep you warm and dry.

Our water-repellent down sleeping bag recommendation

Excellent insulation properties at an affordable price. 

Hack 5 - Hack your campfire

In cold weather camping, a campfire is necessary to stay warm. Because outdoor conditions can be unpredictable, you must know how to light up a fire even when firewood is wet. Before you head out, soak cotton balls in petroleum jelly. Cotton balls are a quick-fire starter. You should build a fire that is wide and able to give the amount of heat you need.

If you want to know how hot a campfire can get, read this article. 

Other essential Cold Weather Camping Gear

Check out our list of other vital gear you should have to stay comfortable and safe in cold weather camping.

Waterproof insulated gloves

Camping in cold weather requires you to have waterproof and cozy gloves that will protect you from frostbite. The best winter gloves have a waterproof exterior, moisture-wicking properties, and adequate flexibility in the fingers.

Navigation tools

Finding a route in the winter can be difficult due to snow alteration with the appearance and shape of the landscape. It is crucial to carry navigation tools, such as a map or have an app.
It is essential to take a GPS device and your map for an added advantage. In addition, keep in mind that cold temperatures drain the battery faster, so you should have it near your body to increase longevity.

First aid kit

Like any outdoor adventure, cold weather camping requires a first aid kit for any emergency. If anything goes wrong, the priority should be to get out of the woods and seek medical help. However, it is good to carry a first aid kit with medications, bandages, and duct tape.

Winter tent heater

You can use equipment to warm up your tent during the winter season. For instance, you can use a tent heater that offers extra warmth. We recommend picking Mr Heater’s 18,000 Btu Model if you are camping in freezing weather. It provides enough heat to warm up your tent.

If you are looking for a small portable heater, you can choose Mr Heater Little Buddy. We have prepared a detailed review of it. Portable tent heaters usually run on propane, so you should follow all the safety precautions when using them in your tent.

Luckily, most models in the market have safety features that will auto shut off the heater when it is knocked down or when oxygen levels are low.

How Cold is Too Cold for Dog Camping?

A dog is a man’s best friend. Your dog will follow you anywhere, even on a winter camping trip. While winter camping may be considered extreme to dogs, some love the white winter motherland. If you plan on taking your dog with you for camping during the cold season, I know you are wondering – how cold is too cold for dog camping?

Generally, most dogs are comfortable in temperatures above 45-degrees Fahrenheit. If the temperature drops, most dogs will show signs of discomfort and the need to go outside. Unless your dog is of a specific breed suited for cold weather, it shouldn’t spend much time outdoors when the temperature is below 45°F.

For your winter camping trip with your dog to be a success, you have to take extra precautions. You should never leave your friend unsupervised outside when the temperature is 32°F or lower.

Factors that determine your dog's cold tolerance

Like humans, dogs have individual opinions about cold weather. Here are some factors that play a role in how your dog feels about cold:

  • Breed
  • Coat type
  • Size and Weight

Breed

Certain dog breeds are naturally adapted to winter temperatures. Such breeds can handle the cold and still thrive in it. For instance, mastiffs, huskies, and St. Bernads have gold tolerance to cold temperatures.

Talk of Huskies; they can tolerate temperatures below 0-degrees F. however, they must be well protected with the right gear. 

On the other hand, you may find breeds like Ibizan hounds and Chihuahuas who prefer warm conditions. Surprisingly, Chihuahuas can only withstand temperatures down to 70°F.

Hence, the characteristics of the breed affect its tolerance to cold temperature.

Coat Type

Most dogs with thick, coarse, dense fur feel comfortable in cold temperatures. The dogs with fine or thin fur feel a little uncomfortable.

Still, if your dog had a haircut recently, they will not be comfortable in cold weather temperatures. You also have to think about how close your friend is to the ground. Consider using a dog mat.

If it has a thick coat and shorter legs that bring the belly closer to the ground, it will get chilly faster. As your dog walks along the ice, the coat will pick ice and snow. In addition, the color of your dog’s coat can keep them warm. Dogs with darker colors tend to retain heat faster than those with brighter tones. If your dog has a brown or black coat, it will be comfortable in freezing weather, mainly when it is sunny.

Your dog's size and weight

Small dogs get cold easily than larger breeds. Because small dogs have more surface area to lose heat, they dislike spending time outdoors when it’s cold.

Larger breeds stay warm because they have more body fat and thick fur for insulation. So, bigger or average dogs with extra weight are suitable for cold temperatures.

FAQ

What are the coldest months to go camping?

If you are in the northern hemisphere (US, Europe), the coldest months to go camping are from November to March. On the other hand, if you are in the southern hemisphere (Australia, Latin America, Africa), the coldest months are from May to August. 

Where I can check the weather forecast before going camping?

We recommend using accuweather.com. It is a free website and has provided us with 

Can I bring my dog for winter camping?

Yes, there are no problems. Make sure that follow the tips detailed above and consult a vet if you have any doubts. You might want to look at our post about tips for camping with dogs.

Can I bring my dog for winter camping?

Yes, there are no problems. Make sure that follow the tips detailed above and consult a vet if you have any doubts. You might want to look at our post about tips for camping with dogs.

Conclusion

Winter camping is fun and suitable for people ready to go far beyond their limits for new experiences. However, it requires a lot of preparations and precautions to stay safe.

This article has explained how cold is too cold for camping, essential cold weather camping gear, how cold is too cold for dog camping, and cold weather camping hacks that will help you survive the harsh winter temperatures.

Happy winter camping!

13 tips for Camping in windy conditions

We all have been in this situation – out of the blue, a wind load of more than 50km/h reach our campsite. Our tents start to shake or threaten to blow away – it becomes a little bit scary, and you might get worried about your safety and wellbeing! 

So the natural question is: what are hacks for camping in windy conditions? We recommend a few measures, such:

a) Before arriving at the campsite

  • Check the weather forecast for your camp.
  • Choose a suitable tent
  • Choose the adequate camping gear
  • Consider using smaller tents.
  • Don’t go camping by yourself

b) After arriving at the camping site

  • Before pitching your tent, check the wind direction 
  • Ensure that the tent is adequately pegged 
  • If possible, set your tent up in a protected area
  • Avoid using the rainfly (if possible)

c) In case of high winds

  • Secure your campsite
  • Consider opening tent windows 
  • Extinguish any campfire
  • Stay calm and don’t panic

Let’s detail each of them to ensure that you are safe in case of a high wind load. 

hacks for camping in windy conditions

Tips for camping in windy conditions

Before arriving at the site

Tip 1 - Check the weather forecast

Regardless of the wind loads, you should always check the weather forecast before camping. It will help you plan your trip and what gear you should bring with you.

There are multiple sites available to check weather conditions. We usually use accuweather.com, as it is free and has generally given us accurate forecasts (they will all be wrong at some stage).

Tip 2 - Choose a suitable tent

Overall, you should not worry about wind loads below 20mph (32km/h) for most tents. These loads are considered standard, and your tent should handle them easily.

However, as wind loads increase above the 35km/h threshold, it is time to start thinking about stakes and pegsIf wind loads grow significantly above 65km/h, consider cancelling your trip or picking a special tent. These wind levels can blow away your  tent.

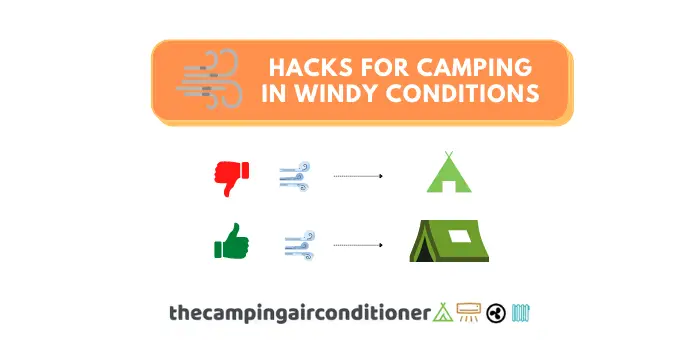
Another crucial aspect here is tent shape. Overall, dome tents perform much better in windy conditions than cabin tents. 

Their shape provides them with an optimal structure arrangement to support rainy and windy weather. The highest point is the centre, and the walls are inclined towards the ground. This shape significantly decreases the risk of your tent blowing away.

After thorough research, we recommend the MSR Hubba Hubba NX 2-Person model for high wind conditions. 

Tip 3 - Consider smaller tents

The smaller the surface area exposed to the winds, the better. Smaller tents will naturally offer better aerodynamics to handle high wind loads. 

Therefore, it might be good to review that extra space you always consider for comfort camping.

Overall, our rule is allowing for 20%-25% extra space for each camper – for example, if you are camping in 4, consider taking a 6-people tent. In this case, however, it is good to split into groups in windy conditions and have two campers in two different 2-people tents.

Tip 4 - Choose the adequate camping gear

Apart from a suitable tent, make sure that you also have adequate auxiliary camping gear, such as:

Tip 5 - Don't go camping by yourself.

If possible, always bring a friend on board! Apart from making the trip funnier and more pleasant, it might be a good idea to have an extra pair of hands to hold the tent down!  

After arriving at the campsite

Tip 6 - Check the wind direction

Understand where the wind blows typically and use your basic knowledge of aerodynamics to pitch your tent.

Avoid pitching the lateral of your tent perpendicular to the direction that the wind blows. The laterals usually comprise the tent’s most extensive area and don’t want it facing the airflow.

Tip 7 - Ensure the tent is adequately pegged and fixed to the ground.

If winds are going above 20mph, you should consider using stakes and pegs. They will be crucial to maintaining the tent’s stability in windy conditions. 

Check for the tent’s manufacturer instructions on fixing the pegs and stakes. Each shelter has different design specs, and optimal safety might be obtained with different configurations. 

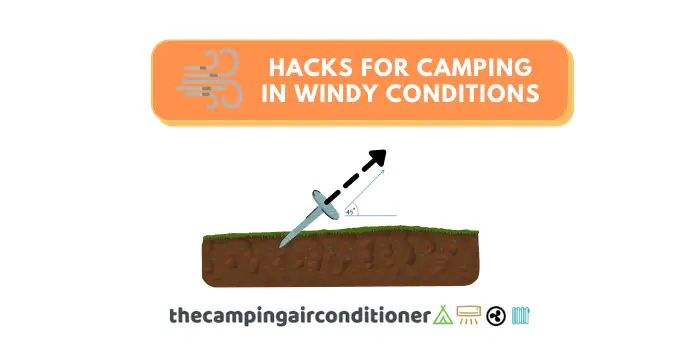
Make sure that you pound your pegs and stakes on the ground with the correct angle. Overall, we recommend using a 45 degrees position, but check instructions from the tent’s manufacturer.  

Further, if you are camping for a couple of nights, play on the safe side and check the status of ropes, stakes, and pegs daily. Never let them get loose. 

tent stake 45 degrees

Tip 8 - Set up your tent in a protected area

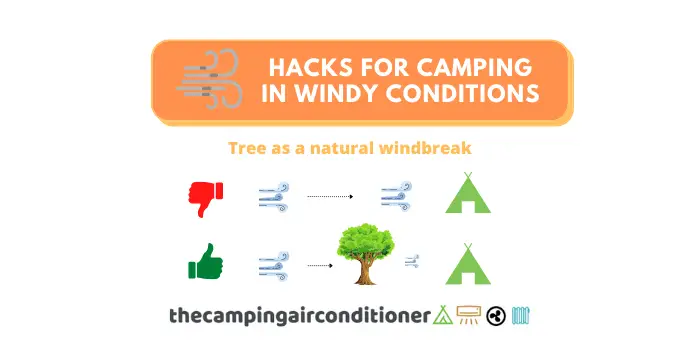
Always look for natural windbreaks, such as threes, and structures in the campsite. You can even use your car as a windbreaker in the worst-case scenario. Avoid pitching your tent on top of the hills or open areas since this will significantly increase wind exposure.

hacks for camping in windy conditions - tree as windbreak

Tip 9 - Avoid using the rainfly

If the weather forecast indicates no rain, there is no reason to use the rain fly bit. It will cause aerodynamic drag and increase blowing away risks in high wind loads.

In case of high winds

Tip 10 - Secure your campsite

In case you notice high winds are coming in your tent’s direction, do the following:

  • Double-check how stiff are pegs, stakes, and  guy ropes
  • Relocate all your camping gear, personal belongings, and accessories inside the tent. 
  • Retract or remove awnings 
  • Remove you rainfly 
  • If you have any electric equipment connected to power, it might be worth disconnecting them 
  • Turn off your tent heater

Tip 11 - Consider opening tent windows

As detailed in tip 6, you can facilitate the airflow and reduce aerodynamics drag by opening your tent windows so that tent’s walls creates less wind resistance.  The rationale is that wind will go through your tent without carrying it away.

Tip 12 - Extinguish any campfire

As detailed in how hot is a campfire article, the more oxygen available, the longer, more burning and more flames you will have in a campfire.

Things can get out of control during windy conditions, and the fire can spread very quickly. Hence, it is prudent to extinguish it straightaway. Make sure that you drown it with water, and there is no chance for reignition.

Tip 13 - Stay calm

Panicking will never help. Keep calm and make sure you put in place all the previous tips. By doing that, your chances of having your tent blown away are minimal.

If you are anxious and nervous, take a deep breath and relax. Things will come down at some stage. If anxiety feelings do not stop, protect yourself in your car.

FAQ

How much wind can a tent withstand?

This will vary according to each tent,  if you use pegs and stakes or not, soil conditions and many other factors. Overall, we can classify wind speeds in the following categories: 

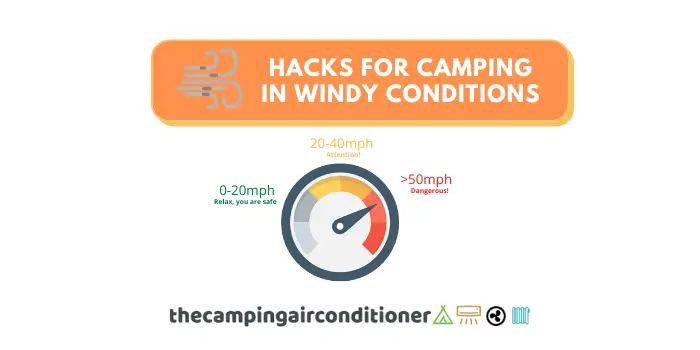
  • Less than 20mph (32km/h) – This is considered a light wind condition, and the majority of tents should be able to support this load without much trouble
  • Between 20mph and 40mph (32hm/h and 65km/h) – This is considered an intense wind load, and you should consider using tents stakes and pegs. 
  • Above 50mph (65km/h) – This is considered a dangerous wind load and if you intend camping in these conditions, make sure that you have the proper gear. 
how much wind can a tent withstand

Are there tents for high wind loads?

Yes, there are. You should take into consideration multiple factors to choose it, such as tent weight, tent’s size, height, and shape, poles, and stakes. 

After a quick research, we recommend the following model –  MSR Hubba Hubba NX 2-Person. This dome-shaped tent has silicone poles specifically designed to support fierce winds.

What is the best tent shape for windy conditions?

Dome tents will perform better than cabin tents in windy conditions. This is because of their natural shape and intrinsic aerodynamics features.

What is the best tent material for windy conditions?

Each tent material will come with its advantages and drawbacks. Overall:

  • Canvas tents are more robust and heavier and tend to be used in bigger tents, therefore not ideal for windy conditions.
  • Nylon and Polyester tents are very similar, with nylon having a higher strength-to-weight ratio. Both materials are commonly used for dome tents because of their lightweight characteristics. 

Ultimately, we believe that tent shape is much more important than the fabric used to manufacture it. 

Conclusion

We hope these tips come in handy and are helpful for your next trip. Never forget – the secret to a successful journey is planning!

Give special attention to tips before arriving at the campsite to ensure you are prepared in case of a wind storm.

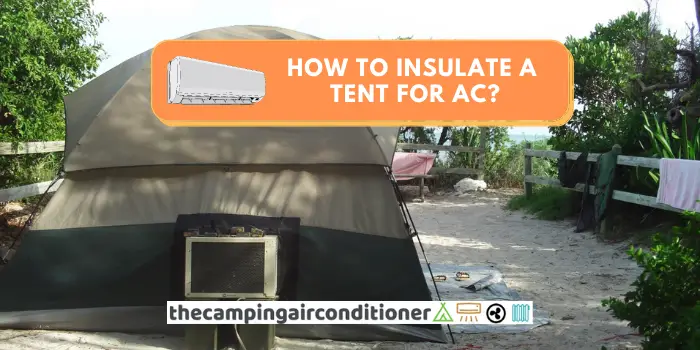
How to insulate a tent for AC? Check these tips!

Camping during summer days is one of our preferred activities. Enjoying the sunlight with our kids, dog, and friends make us relax and increase our vitamin D intake. However, we all know how sometimes summer camping can get unbearable with scorching and humid weather.

Having a tent air conditioner has dramatically helped us improve our camping experience on these warm days. But how to insulate a tent for AC? We have prepared 6 excellent tips for you:

  • Use a tent tarp
  • Use duct tape and/or pool noodles to suppress any minor leakage
  • Insulate your tent floor
  • Cover your tent with thermal blankets
  • Check your tent material
  • Use a tent with AC Ports
Let’s go into detail in each of them below. 

Why do you need to insulate your tent for AC?

A straightforward response is: because you want to keep the cool air trapped inside your tent. If you are using a tent ac, the last thing you want is the chilly breeze to leave your shelter.

And, how can you do it?

You need to create thermal barriers to retain the cold air inside your tent and avoid hot air inflow.

How to insulate a tent for AC - Tips

Tip 1 - Use a tent tarp

Overall, tent tarps are cheap, easy to handle, and a useful insulating tool. Covering your tent with it will help create a thermal barrier between your shelter and the warm environment around it. 

We recommend using reflective models to mirror UV rays and avoid the warm air getting trapped inside your tent. 

Further, reflective tarps are waterproof, which can also help on rainy days if you use a tent with high breathability levels. 

Since they will be exposed to sunlight (and potentially water), we suggest buying heavy-duty versions, which come with internal metal and structural reinforcements to improve material durability and stability. 

Reminder: Make sure that you check your tent dimensions and buy the tarps accordingly (you might need more than one unit).

Heavy Duty Tarp Recommedations

Tip 2 - Use duct tape and pool noodles to suppress any minor air leakage

Even the minor holes might be harmful to your tent insulation. They create cold air leaking opportunities that might decrease the efficiency of your tent air conditioner.

When it comes to insulating these minor openings, we suggest the following:

  • Use Duct tapes – They are better suited for little existing tent patches and sealing critical areas, such as the tent ac port. 
  • Pool noodles – The foam used to manufacture pool noodles has outstanding insulating features. You can use it in combination with duct tapes to seal leaking points. 

If you plan to use a window AC, we noted that the critical leakage zone is close to the AC port.

Placing the pool noodles around the ports and fixing them with duct tape solves this issue.

Tip 3 - Insulate your tent floor

Insulating your tent floor will ensure there is no heat exchange with the soil during the day, keeping your tent as cool as possible. 

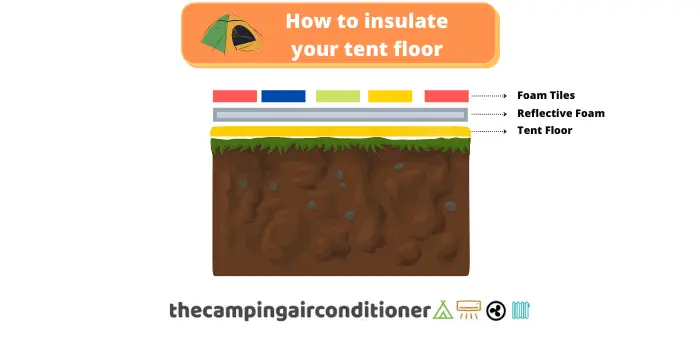
Our suggestion is to use foam tiles, given their ease of implementation. The insulation process is very simple: put a layer of reflective foam on top of the tent floor and then place the foam tiles above it – that is it! 

The sketch below indicates how you should arrange the layers. You can also use yoga mats instead of foam tiles.  

Recommend material for floor insulation

Reflective Foam

Foam Tiles

Yoga Mat

Tip 4 - Cover your tent with thermal blankets

Apart from using a heavy-duty tent tarp, you can also cover your tent with thermal blankets. It will help to trap your AC’s cold breeze even more!

There is no secret here – simply throw it over the tent. If you are camping in windy conditions, it might be worth covering it with an old blanket to avoid it getting blown away.

Tip 5 - Check your tent fabric (material)

Yes, the tent fabric can heavily influence your experience on camping. If you want to learn more about tent fabric, read our detailed article on what tents are made of. 

Overall, there are 3 dominant fabrics:

  • Polyester
  • Nylon
  • Canvas

You can find other alternatives, such as poly-cotton and DCF, but they are not as used as these three. 

Polyester and Nylon tents have great durability and come with great waterproofness because of their manufacturing process. On the other hand, they are known to heave low breathability levels, inducing potential condensation inside your tent. 

Overall, they do not have poor insulation. However, they might come with extra coatings to improve their sealing features. 

Canvas tents are probably the best option for summer camping. Canvas is made of cotton that has low heat retention properties. They have excellent insulation features that might increase the efficiency of your AC.

Bear in mind, though, that canvas tents are usually bulky and heavy!

Tip 6 - Use a tent with AC ports

These days, multiple tent models already come with ac ports included. They are specially designed to support the cooling devices, including placeholders for electrical cables.

Tent with AC ports recommendations:

If you want to read a detailed review of each tent, read our article on tent with ac ports

FAQ

Can I put an air conditioner in a tent?

Yes, there are no problems with it. Ensure that you properly insulate your tent with the tips detailed above, or buy a tent with an ac port.

How can I cool down my tent without electricity?

There are several ways to cool down your tent without electricity. We recommend the following:

  • Choose the suitable tent fabric (read our article on what tents are made of)
  • Pick the perfect spot to pitch your tent.
  • Set your tent up at the right time
  • Purchase battery-powered cooling devices (fans and tent ac)
  • Use reflective blankets to insulate your tent
  • Cooldown your body
  • Watch the ventilation of your tent.
  • Do not use a sleeping bag.

If you want to read more about these tips, read our article on how to cool down a tent without electricity

How to avoid condensation in my tent?

We recommend the following:

  • Ensure there is enough ventilation
  • Keep humid and wet stuff outside the tent
  • Don’t pitch your tent too close to the water
  • Turn heaters off, as they might increase vapour formation. 

Is there a best tent color for summer camping?

Overall, lighter colors tend to retain less heat and, therefore, be more appropriate for summer camping. However, a number of facts should be taken into account with regards to your tent color, such as:

  • Aesthetics
  • Safety reasons
  • Mosquito and bug repellent
  • Effects on sleeping quality 
  • Heat absorption

If you want to read more about it, read our detailed post on tent colors

What is the best tent for summer camping?

We recommend using 2 or 3-season tent options. The 3-season will generally be more robust with better durability.

As for tent fabric, canvas tents are our preferred models.

How do I insulate my tent for winter camping?

The insulating process for winter camping is very similar to the one used for summer camping, apart from minor details. We recommend the following:

  • Choosing the right insulating material
  • Fixing them properly in your tent
  • Insulating your tent floor
  • Using the most suitable tent
  • Using smaller tents
  • Pitching your tent in areas with limited wind exposure
  • Using a tent heater
  • Using a suitable sleeping bag

If you want to know more about it, read our detailed article.

Can I DIY my tent AC port?

Even though we don’t envisage problems with the DYI approach, you need to ensure that you have the proper skills and tools. Overall, we do not recommend it since you might permanently damage your tent. 

What are the alternatives for camping ACs?

Among all the alternatives, we recommend considering:

Conclusion

A tent AC will help you tackle the warm and humid days during summer camping. However, if you want to improve its efficiency, make sure that you follow the tips detailed above.

We hope these tricks will help you have a chilly environment during your hot camping days.

Evapolar Evachill (Review) – Is it the BEST mini camping AC?

Evapolar Evachill is a portable cooler used by many campers as an air conditioning solution for hot weather camping. Is it worth investing your money in this device for your next camping trip?

In our opinion, yes, it is. The equipment is compact and runs on low energy consumption, allowing it to run from USB batteries. However, you should be aware that it might not be a good solution for camping in high humidity, given that it is technically classified as an evaporative cooler rather than a small camping AC unit. 

Let’s go through a detailed review below. 

Evapolar Evachill - Review Summary

In a hurry? No problems – below is our review summary.

Evapolar Evachill is small, portable, energy-efficient, and budget-friendly (when compared to an AC unit) mini camping AC that quickly cools the air around you. We loved the fact that it can be USB powered, making it possible to run from solar-powered power banks! 

On the other hand, it requires cartridges replacement, which can be expensive (almost 50% of the equipment price) and might not perform well in humid areas. We also note that this is a small model and will not be able to cool down medium-to-large tents. 

The equipment comes in 3 different colors for you to choose: ocean blue, opaque white, and urban grey. We prefer the ocean blue option!

Our review focused on its utilization as a tent air conditioner, and we will concentrate on camping-related aspects. 

SpecificationsEvapolar Evachill
Weight2 pounds
Dimensions‎6.5 x 6.5 x 6.5 inches
USB powered?Yes
Wattage7.5 Watts
Voltage 5V
Autonomy8 Hours
Noise Level50dB
Pros
  • Compact (Excellent Portability) and efficient (Cools relatively quickly)
  • Energy-efficient (Run on USB battery)
  • Excellent value for money
  • Ideal for small tents
  • Kids and pet safe (no mould)
Cons
  • Limited cooling effect for big tents
  • No water indicator (for refill)
  • Cartridges replacement are expensive.
  • Do not perform well in high humidity environments

Verdict: Evachill is an excellent mini air conditioner for campers. It is compact and lightweight and can run on batteries (USB-Compatible), making it perfect for small tents. However, it probably will not be very efficient in humid environments.

Evapolar evaCHILL Portable Mini AC
  • 3-IN-1: Cools, humidifies the air, and has a night light.
  • Hinder mold and bacteria growth
  • Ideal for small areas
  • Leakage-proof 
  • Works up to 8 hours without water refill

How Evachill Works

This equipment works similarly to an evaporative cooler but has some differences. Its technology uses different materials during the evaporative process, making it more efficient, clean, and safe. Check the video below for further information. 

Evapolar Evachill - Design and Specifications

Evachill comes in three different colours: opaque white, urban grey and ocean blue. The general specifications are detailed below.

Design & Weight

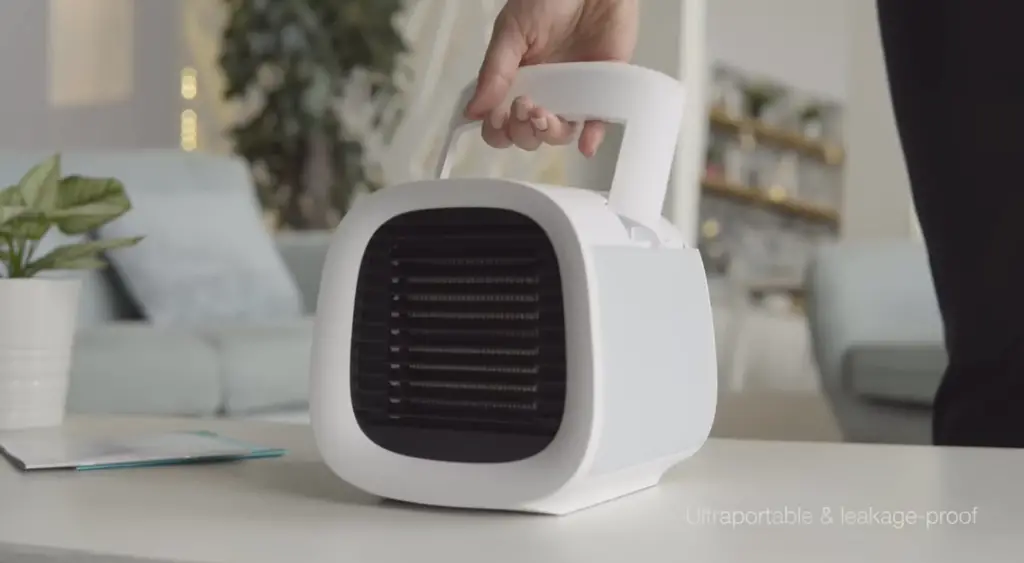
The equipment is very compact and lightweight (weighs only 2 pounds), which makes it ideal for campers with small tents and backpackers. You can easily carry it around without much trouble with its handle.

Besides being ultraportable, the equipment has been designed to be water leakage-proof, ensuring a dry experience while using it inside your tent (we recommend using it on a flat surface, though). 

evapolar evachill review - holder

Operating Specifications

The 800ml tank will generally run for 8 hours without refill, ensuring a cozy and trouble-free night. This model does not come with a watermark indicator, so make sure that you are constantly monitoring it. 

The operating noise level (50db) is equivalent to a quiet office environment or a quiet residential street, allowing you to recover your body and mind while sleeping with it.

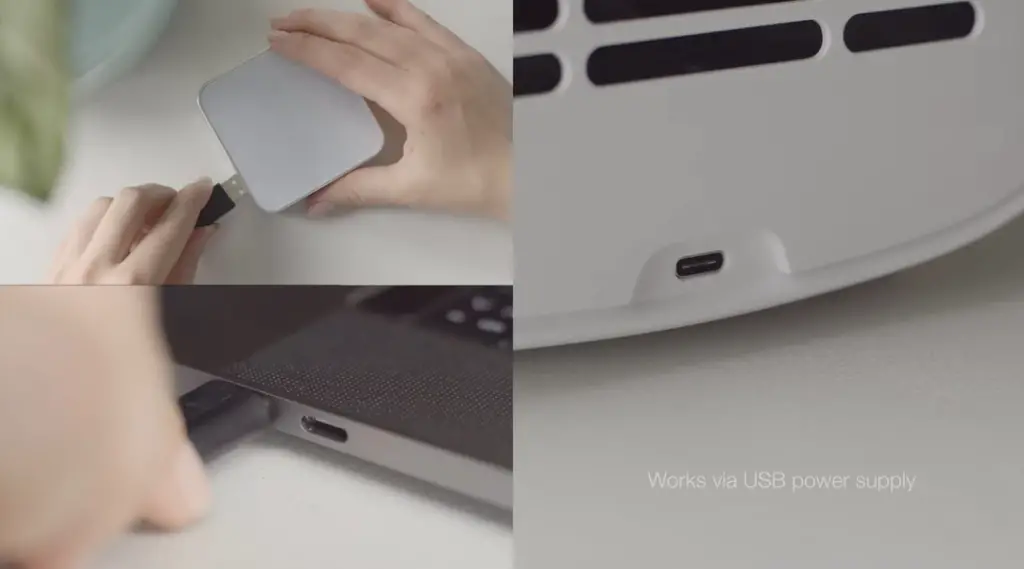
The extremely low power consumption is what makes this model so attractive to us – it can easily run from a USB battery or a solar powered power bank, making it a perfect match for your camping trips (and summer backpacking adventures)

evapolar evachill review - usb supply
Evapolar evaCHILL Portable Mini AC
  • 3-IN-1: Cools, humidifies the air, and has a night light.
  • Hinder mold and bacteria growth
  • Ideal for small areas
  • Leakage-proof 
  • Works up to 8 hours without water refill

Ease of use and Maintenance

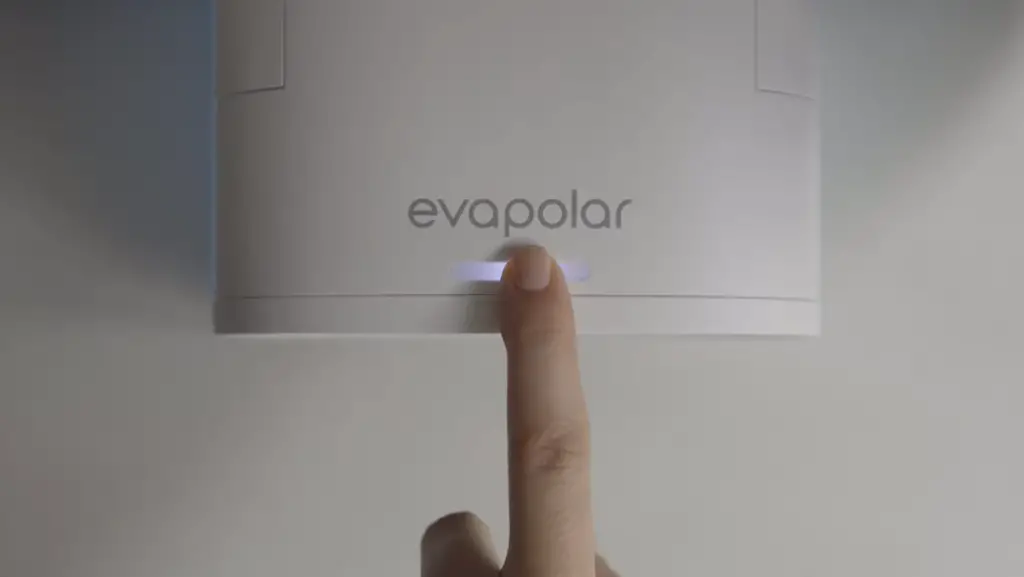
The equipment is very easy to use and handle and comes with a central button that controls its operation, including turning on and off the humidifier option.

Its internal material (Eva breeze) is made of inorganic nanofibres that hinder mould and bacteria growth, which is common in evaporative coolers’ filters. Eva breeze holds water between its fibres while cellulose conserves it, which degrades it over time.

Its maintenance is elementary and only requires a quick clean and internal cartridges replacement. According to Evapolar, you will need to replace the cartridges every 3-6 months to keep the cooling capacity high (it will depend on how often you use it and how dirty the air passing through the device is).

Evapolar evaCHILL Portable Mini AC
  • 3-IN-1: Cools, humidifies the air, and has a night light.
  • Hinder mold and bacteria growth
  • Ideal for small areas
  • Leakage-proof 
  • Works up to 8 hours without water refill

How to Use Evachill

You will only need to fill the water tank and connect the equipment to the power source. The central button controls the equipment function, where you can turn it on and off and control the fan speed.

Alternatives to Evapolar Evachill

We have undertaken research and identified some alternatives to Evachill that it would be good to consider:

  • Evapolar Evalight – Lower noise level with similar autonomy; drawback – it is not USB compatible
  • HiFresh Cooler – lower investment, higher autonomy; but increased noise levels. 
SpecificationsEvalopar EvachillEvapolar Evalight HiFresh AirCooler
Weight2 pounds3.08 pounds2.44 pounds
Dimensions‎6.5 x 6.5 x 6.5 inches8 x 8 x 10 inches6.69 x 5.51 x 8.6 inches
USB powered?YesNo Yes
Wattage7.5 Watts5 Watts7 watts
Voltage 5V110V5v
Autonomy8 Hours8 Hours13 hours
Noise Level50dB25dB61.5db
Investment$$ (Approx. $100)$$$ (Approx. $150)$ (Approx. $50)
Suitable ForSmall tentsSmall tentsSmall tent
Evapolar evaCHILL
Compact option
Evapolar evaCHILL
9.3
  • USB compatible (powered)
  • Lightweight 
  • Good value for money
HiFresh Cooler
Budget Friendly
HiFresh Cooler
9.1
  • USB Compatible
  • Cheapest option
  • Highest noise levels
Evapolar EvaLIGHT
Quietest
Evapolar EvaLIGHT
8.8
  • Lower noise levels 
  • 8 hours autonomy
  • Not USB compatible

FAQ

Is it safe to sleep with Evachill in a tent?

Yes, there are no problems in sleeping with it a tent. 

Does Evachill works in all weather conditions?

Evachill is extremely efficient with dry weather. However,  its efficacy might significantly decrease in environments with high humidity. If you want to further understand why, read this article

What is the cost of Cartridges replacement for Evachill?

Even though costs are not prohibitive, replacing the cartridges every 3-6 months significantly increases maintenance costs compared to the price of a brand new device. 

Conclusion

Evachill is an excellent alternative for campers. Its portability features,  size, and weight puts the equipment on top of my choices for a portable camping ac.

Further the fact that it can rua via battery is ideal for outdoors days – you don’t need to worry with electrical connections and hookups. Its stylish design comes as the ice on the cake, with a great appearance. 

The downside for us are the cost of cartridge replacement (even though it might last long if you don’t use the device too often) and the lack of water level indicator. 

Evapolar evaCHILL Portable Mini AC
  • 3-IN-1: Cools, humidifies the air, and has a night light.
  • Hinder mold and bacteria growth
  • Ideal for small areas
  • Leakage-proof 
  • Works up to 8 hours without water refill

How to insulate a tent for winter camping? (8 easy tips)

Are you a winter camping fan? Or are you considering going camping to relieve stress and have a great time outdoors during winter? The freezing airflow might hinder you at first, but don’t worry – we have compiled special tips to make your winter camping trip bearable.

These are our 8 top tips to insulate your tent for winter camping: 

  • Pick an adequate insulation material 
  • Install the insulator on your tent correctly.
  • Insulate your tent floor
  • Use a 4-season tent
  • Choose a smaller tent
  • Pitch your shelter in the perfect spot – avoid wind exposure
  • Bring a tent heater
  • Use a suitable sleeping bag

 The next sections will describe each tip in detail – let’s go through them. 

Tent insulation - basic principles

Basically, we want to insulate our tent to ensure that warm air is trapped inside our tent in winter. However, the same principle is applied during hot days, when we want our insulation system to keep the cold air inside.

But how do we do it?

The answer is simple: we need to create a thermal barrier to retain the heat inside the desired environment. Therefore to discover the top-notch insulation approaches, we need to focus on creating these barriers and what they are made of.

How to insulate a tent for winter camping - 8 useful tips

Tip 1 - Pick the right insulation material

There are multiple options for insulation materials, such as cellulose, mineral wool, natural fibres, polyurethane, polystyrene, and many others. 

However, if you are camping, you are probably after something lightweight, foldable and easy to carry. We recommend using reflective foam, thermal blankets, and reflective foil in this sense. 

They are easy to handle, pack for your trip and find available in multiple stores. 

Tip 2 - Properly install it on your tent

Now that you know the best materials to use for your tent insulation, it is time to learn to use them.

Overall, we recommend insulating the tent’s inner par with reflective foam since they tend to offer better insulation features.

This material is very light and therefore easy to be fixed. We recommend placing it between the tent fabric and poles and using tapes to fix it. You can also use pegs small pegs.

As for the exterior, you can throw a thermal blanket over it. To avoid letting it blow away, you can place a heavier cover on top of it. Check the video below with a practical guide.

By doing this, you will have a double-insulation layer, which might significantly increase heat retention. 

Tip 3 - Insulate your tent floor

You might not be aware, but the soil constantly exchanges heat with the surface. Insulating your tent floor is a crucial measure to ensure you keep your tent warm during winter.

How do you do it?

Even though there are multiple ways to do it, we link the following the foam tiles approach since it is a convenient solution.


First, lay the reflective foam on top of the tent floor and place the foam tiles above it. See the sketch below with further details. 

Alternatively, you can also use yoga mats. They are flexible and easy to carry and place. 

Tip 4 - Chose the right tent

There are multiple tent options available these days: 1, 2, 3, 4, and 5-season tents. Each of them can be made with different fabrics to suit specific needs. 

Overall, the higher the grade, the more robust the tent will be for winter camping. For example, 5-season tents are designed to handle icy weather and are suitable for experienced campers (you probably don’t need a 5-season tent). 

Even though it is named 4-season tents, it is not fabricated to be used all year round. They are specifically developed for the mild cold season, aiming for early spring and late fall weather. Usually, these equipment have a lower profile to withstand strong winds and snowfall. 

The 3-season tent can be used in different seasons, and there are various models available in the market these days. They tend to be lighter and provide more breathability to support warm and cold days. 

The 1 and 2-season tents are much simpler and more suitable for summer days. 


Insulator for tents that we recommend

Why we recommend?

It provides excellent temperature regulation and insulation features, with an extremely easy set-up. Further, it can be used on boats, camper vans, and RVs. Overall, it is a top-notch insulated camping tent. 

Why we recommend?

Affordable and efficient 3-season tent with good wind and waterproof features. 

Tip 5 - Bring smaller tents

The rationale behind this is logical (from the physics): the bigger the tent, the more heat is required to warm it upTherefore, choose the smallest tent that can provide you with enough space for your trip.

Tip 6 - Pitch your tent areas that are not exposed to wind flow

Before setting your tent up, check the following tips:

  • Avoid pitching your tent in open fields. The wind circulation might increase the cold feeling (wind chill factor).
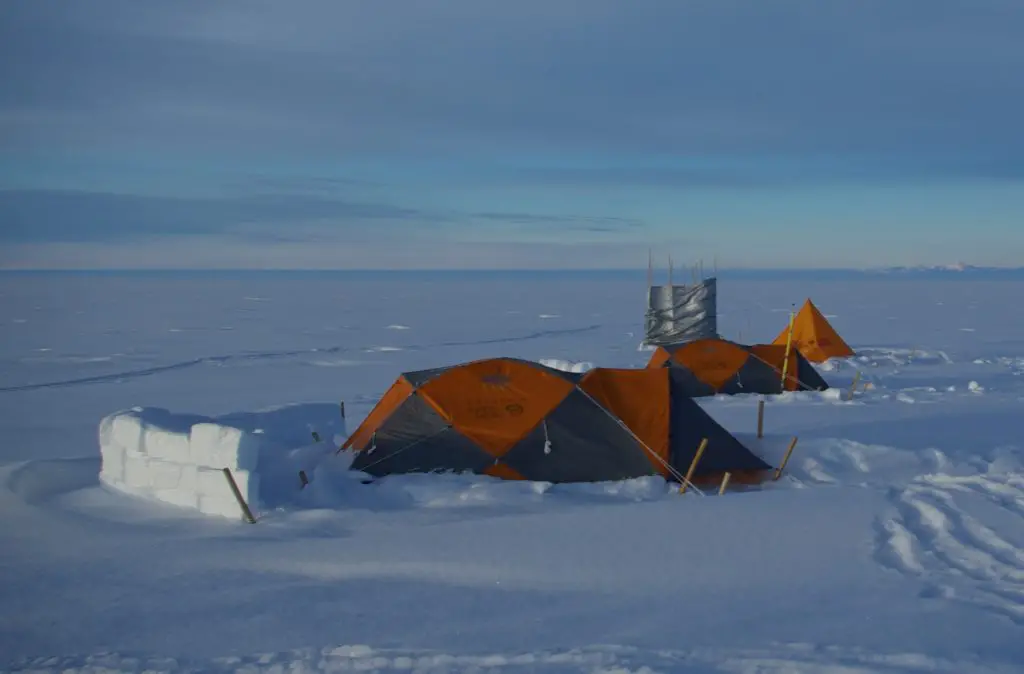
  • If camping in the snow, you can create a windbreak. If there is no snow, you can use a tent tarp as a wind protector. 
how to insulate a tent for winter camping - snow windbreak

Tip 7 - Use a tent heater

Even though tent heater is not a insulation measure, it definitely can help you in winter days. 

One of the tricks that we recommend here is after insulating the tent (following all the previous tips), turn your heater on inside it and leave it working for 1 hour before sleeping. When you go to bed, the environment inside the tent will be warm and cozy.

Note: we do not recommend you sleeping with the heater turned on for safety reasons. If you learn more about it, read our article on safety of propane heaters inside a tent


Tip 8 - Use a suitable sleeping bag

Similarly to tents, sleeping bags also have different ratings, which are directly related to the temperature levels they can handle. They are usually classified according to the EN13537 (European Norm).

sleeping bag rating
Source: Snowys.com.au

Before buying your sleeping bag, check the average temperature of your campsite and look for a sleeping accordingly. Do not get an extremely warm option if you are camping in mild winter (otherwise, you will probably be sweating all night).

FAQ

What is the best for winter camping - a 3-season or a 4-season tent?

It depends on where are you camping. The 4-season tent are designed for heavier winter condition, whereas the 3-season option retains some flexibility for summer camping. 

Apart from tent insulation, how can I keep my tent warm during winter camping?

We have prepared a detailed guide on this and invite you to read carefully – how to heat a tent without electricity. 

Are there the best tent colors for winter camping?

Overall, darker colors tend to retain more heat and would be more appropriate for winter camping. However, there are other variables that you should consider before choosing your tent tone variation – for more information, read this article.

Conclusion

Camping during winter might be a great experience. To make the most of it, consider insulating your tent to have a warm and cozy night.

Apart from the tips above, you should also consider wearing winter camping clothes, such as thermal underwear and balaclavas. 

We hope this article was helpful and should you have any doubts or suggestions, please do not hesitate to contact us!

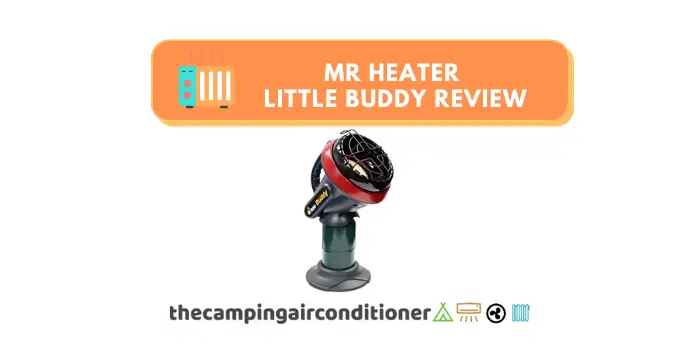
Mr Heater Little Buddy (F215100 MH4B) Review

Mr Heater is known for its high-quality and durable products. The Little Buddy (F215100 MH4B) is no exception and comes in hand for smaller tents. We have prepared a detailed review of this product and hope can address all your doubts!

Mr Heater Little Buddy Review

Being the entry model from Mr Heater, the product is affordable and offers excellent value for money. Apart from monetary aspects, Little buddy is compact and powerful, ensuring optimal outcomes for cold nights.

Without further due, let’s go for our review.

Mr Heater Little Buddy Review

Review summary

Pros

  • Compact and Lightweight
  • Ideal for backpackers and solo/dual campers
  • High quality and heavy-duty material
  • Great value for money
  • Simple Set and easy set up
  • Quiet 

Cons

  • No adjustable heating settings
  • Limited heating for big tents
  • Small propane bottle might require constant replacement 
  • No carbon monoxide sensor (you can buy one separately)

Output

The Mr Heater Little Buddy can produce up to 3,800 BTUs (British Thermal Units) per hour. 


BTU is a standard unit to measure thermal energy, and putting it in simple words, 1 BTU is the amount of energy needed to heat 1 pound of water (~450g) by one Fahrenheit degree (at sea level).  


According to Mr Heater, this is sufficient to heat areas to 95 square feet (8.82m²). Therefore, Little Buddy might be most appropriate for smaller tents or personal use.  


One of the downsides of the product is that you cannot adjust its output potency. The product might consume more propane than required on not-so-cold nights because it does not have adjustable heating settings. 

Size and Weight

Little buddy is small and lightweight, measuring 11 x 11 x 11 inches (28 x 28 x 28cm) and weighing 5 pounds (2.26kg)

Therefore, this heater is ideal for moving around and an excellent alternative for backpackers or solo campers.

Bear in mind that it can get even smaller and lighter if the propane recipient is extracted.

Safety Features

Mr Heater Little Buddy comes with two necessary safety devices: a low-oxygen detector and tip-over shutoff mechanisms. As the names suggest, the equipment stops working in case low oxygen levels are detected or if the device inclines excessively / tip-over. 

Overall, propane heaters can produce carbon monoxide, a dangerous gas that can lead to poisoning, internal tissues damage, and even death. This gas is one of the trickiest, given it is colorless, odorless, and tasteless. 

If you plan to use little buddy in closed environments for prolonged periods in closed environments (i.e. your tent), you should consider buying a carbon monoxide detector

Tips: Always leave an area for air circulation. According to Mr Heater, Little Buddy requires a vent circulation area of 4 square feet (0.37m²).

Suggested Article

Quality and Durability

Overall, Mr Heater is widely recognised for its product’s high standards. Even though Little Budy is the entry line option, it comes with heavy-duty material, which is known for lasting multiple years.

Ease to install, operate, and handle

The equipment is compact and very easy to handle and install. It comes with 3 different pieces: 


a) The heater head

b) a Plastic Base

c) A propane gas bottle. 


When attaching the propane bottle to the heater head, make sure that there are no gas leaks. The video below shows a step-by-step guide on how to install it. 


Once everything is connected, you can press and hold  the red start button for 30 seconds, and your equipment will be radiating heating soon (watch the video below for further details). 

Value For Money

Given all the features above, we have no doubts that Mr Heater Little Buddy offers the best value for money in the market for small heaters. We carry around one model for our winter trips, and it has been with us for more than 5 years. 

You probably can find cheaper options, but their quality is inferior, and they tend not to last too long. If you consider the long term, it is a minor investment (less than $100) that will provide you with comfort, reliability, and safety.

Mr Heater Little Buddy - Promotional Video

FAQ

Is it safe to use Mr Heater Little Buddy in a tent?

Yes, it is. However, we recommend you read the instructions carefully before using it. 

A significant part of tent heater incidents reported by campers is equipment misuse and unsafe practices when using the heating devices, such as leaving the heater running for long hours without monitoring conditions. 

Consider buying a carbon monoxide detector to avoid potential poisoning and NEVER sleep with the heater turned on. 

Will Mr Heater Little Buddy heat a big tent?

No. Given its small size, they are recommended for small tents or personal use (it might do a good work for a couple as well). For larger tents, we recommend Mr Heater 232000 MH9BX Buddy.

Does Mr Heater Little Buddy require ventilation for operation?

Little Buddy requires a vent opening area of approximately 4 square inches (minimum) for adequate ventilation during operation. Do not use other fuel burning appliances inside.

How do I clean and maintain my Little Buddy Heater?

The video below shows a step-by-step maintenance guide for Mr Heater Little Buddy Heater. 

Is Mr Heater Little Buddy waterproof?

Mr Heater recommends NOT using Little Buddy if any part has been under water. 

Where can I buy extra propane bottles for Mr Heater Little Buddy?

You can easily order it through Amazon or any other store. To clarify, a 1lb (pound) bottle is the same as a 16oz (ounce) bottle. We recommend buying a pack of 4 or 6.

Avoid exposure to high temperatures and keep them away from potential flames when storing them. 


Are there other good tent heater alternatives?

Mr Heater Little Buddy - Verdict

Little buddy is an excellent propane heater and extremely easy to install, carry around and operate. 

With an excellent value for money offer, it comes with essential safety devices (auto-shutoff mechanisms) for low oxygen levels and tip over. The heater is ideal for small tents and/or individual usage (it can also work for a couple). 

On the downside, it does not come adjustable heating and carbon monoxide detector, and 1lb propane gas bottle might require constant replacement (a full bottle is supposed to last for approximately 5 hours). 

All in all, we believe that this is the best option in the market for small propane heaters. 

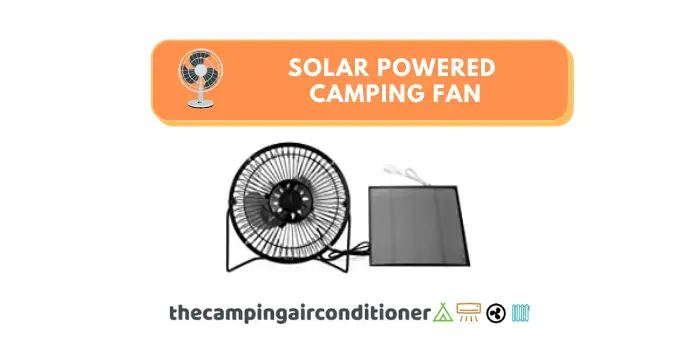
Solar Powered Camping Fans – Budget-Friendly options!

While camping can be a great outdoor activity, it can become a hassle during the summer – It is hard to enjoy camping when it is extremely hot. One solution for cooling down your tent has a solar-powered fan. 

They are great for camping in the summer since they can be easily recharged and offer an eco-friendly approach. ith so many products in the market, it cannot be easy to pick out the best. Luckily, we have made the work easy for you – these are the best solar powered camping fan options in the market these days:

Best USB Compatible – Solar Fan 5W 4 Inch Solar Powered Fan 

Best Heavy-Duty  – Ansee Solar Camping Fan 

Best Multi-functional option – BusyPiggy Solar Camping Fan

Best option with misting line (ideal for dry areas) – ExtremeMist 14″ Misting Fan – OUR CHOICE!

Best option for mid-to-large tents – Cowin Solar Fan Sytem

All of them are smaller and weigh less to pack than tent air conditioners for any outdoor adventure. Below is our in-depth review of each product. 

best solar powered camping fan

Best Solar Powered Camping Fans

Solar Fan 5W 4 Inch Solar Powered Fan

This solar-powered fan (Solar Fan 5W 4 Inch Solar Powered Fan) one of the best gear for camping. The package comes with a solar fan and a charger that keeps it charged to supply you with continuous energy. 

It is constructed with a waterproof design that allows you to leave it outside without worrying about rain or splashes. Besides, this solar-powered fan is ideal for office, RV campers, touring, tree house, dog house, and many more. 

The fan runs fast under direct sunlight, and it works slowly or stops working when the sunlight is weak. If you want to cool your tent at night without noise disturbance, this fan will do the job while operating quietly. 

In addition, the solar-powered camping fan is lightweight and compact to allow you to carry it anywhere.  

Pros

  • It has a powerful and quiet-operating fan
  • User-friendly and safe to use
  • It can be used indoors and outdoors using the USB port
  • The construction is waterproof and durable

Cons

  • This solar panel’s power output is highly affected by weather conditions.

Ansee Solar Camping Fan

Ansee brings you this heavy-duty fan powered by eco-friendly solar energy. The camping fan has a heavy-duty ABS plastic construction that makes the fan durable and reliable even in harsh outdoor conditions. It uses an ultra-quiet motor that allows you to relax in your tent without being disturbed by the noise. 

The Ansee solar-powered camping fan is lightweight, and it is simple to carry, thanks to the included handle. Its double charge design makes it charging efficient, and it has a variable speed control switch that allows you to adjust the fan speed as per your needs. 

Still, it has an LED lighting angle designed to offer user convenience while at the same time protecting your eyes. 

Furthermore, the multifunctional fan comes equipped with utilities that allow you to use it as a fan, a spotlight torch, and an LED table lamp. It is ultra-portable and easy to carry, and it can be used for blackout emergencies, outdoor shade, transportation, and camping.

 Depending on the mode you use, it can continuously work from 4 to 8 hours. It takes 3 hours to attain full charge. 

Pros

  • It is made of a heavy-duty and durable ABS plastic construction
  • The fan operates quietly even in the highest setting
  • Multipurpose and reliable
  • Waterproof and ideal for using both indoor and outdoor

Cons

  • This fan tends to overheat
  • It takes longer to charge.

BusyPiggy Solar Camping Fan

BusyPiggy is not just a fan but also a multifunctional product. It is an innovative camping gear that includes lighting, fans, charging, and emergency signal lights. This is one of the functional camping fans you can find in the market. 

It has three LED light panels with four adjustable brightness levels that can be adjusted according to your cooling needs. Still, you can switch it to red flashing mode for use as an emergency signal light at night. 

The solar-powered camping fan has a built-in rechargeable battery that can continuously operate between 5 to 48 hours (depending on the brightness level). 

The fan can also work with a USB cable powered by a car charger, laptop, power bank, and many more. It is designed with a USB output port to charge your phone, MP3, GPS, power bank, or iPod. In addition, you can hang this camping fan on the branches, tents, or inside cars, thanks to its built-in hook. 

With its compact and lightweight design, you can place it on the desk in the office or at home without needing much space, plus it will be easy to carry around.

Pros

  • The camping fan has four lighting speeds and four wind speeds
  • Made of high-quality ABS material
  • Foldable and easy to store
  • It has a powerful and long-lasting battery

Cons

  • The patent power switch has a design flaw
  • It doesn’t blow enough air to cool large tents or spaces.

ExtremeMist 14" misting fan

ExtremeMist 14″ misting fan is fitted with three mist nozzles and ExtremeMist pump that can be sued to cool large areas in seconds. It has 14″ aluminum blades that blast cool air and cold mist to keep your tent cool when it is warm. 

The misting fan has a 5200mAh battery pack with an A/C charger to pre-charge before using it. What’s more, the powerful battery can provide from 5 to 24 hours of continuous power depending on the speed, and it includes power indicator lights that display the battery level. 

The misting fan includes a 16 ft. misting line which can be used for other tasks like cooling your golf cart, canopy, outdoor patio, deck, beach umbrella, or anywhere else you need to cool. You only need to remove the pump from the base and plug in the mist line. 

In addition, maintaining the fan is simple because its design is simple, and it doesn’t have complicated parts. It is a compact solar-powered fan suitable for camping, BBQs, tailgating, sporting events, and anywhere else you need to charge.

 In addition, the fan includes a USB charging port for recharging and charging your smart devices. 

Pros

  • The misting fan is compact and portable
  • It features an energy-efficient 5200mAh battery
  • A great option for a wide range of outdoor activities
  • It is energy-efficient and operates quietly 

Cons

  • More expensive than the other options

Cowin Solar Fan System

Cowin Solar Fan system combines power and versatility, being ideal for all campers. Due to its size, we would recommend it for mid-to-large tents. Another cool feature of this equipment is its remote control, allowing you to operate from a distance.

It also comes with an alternating current adapter, which ensures that you can charge its battery on cloudy or rainy days. The battery has 4500mAh, which allows the equipment to operate for up to 12 hours.

Cowin Solar Fan Sytem‘s solar panel measures approximately 6 feet and comes with a 16.4 inch (42cm) cable, which is enough. Regarding power, you can choose from 3 different speeds that range from 1000 rpm to 1350rpm.

It is easy to assemble and disassemble, making it o good option for campers.

Pros

  • Comes with remote control
  • Runs up to 12 hors
  • Good for mid-to-large tents
  • Low noise levels when operating

Cons

  • There have been some durability complaints from customers
  • Its size makes it not ideal for backpackers or hikers

FAQ

How long will the battery of the solar powered camping fan last?

Each model will have different specifications, therefore read carefully equipment instructions and check whether it is suitable for you. Overall, expect devices operating from 4-12 hours. 

What are the pros and cons of having a solar powered camping fan?

The pros and cons of solar powered camping fans are detailed below. 

Pros

  • Solar works in many climates
  • Solar is a proven technology
  • Affordable options
  • Eco-friendly 
  • Portable devices
  • Long lifespan

Cons

  • If the device does not have a battery, your equipment will not work in the night
  • Not all solar panels are high-quality (be careful)

Are there more powerful camping fan options?

Yes, there are. If you have budget and power supply in you campsite, we recommend you picking a camping evaporative cooler. 

I don't think a fan will solve my problem. Can I install an AC unit in my tent?

Yes, you can. We have prepared a detailed guide on air conditioning your tent and suggest reading the article below.

Suggested Article

Conclusion

Having a solar-powered camping fan is an excellent alternative if you want to cool your tent in the summer. Solar-powered fans are eco-friendly and portable, and they will save you a lot of money. 

From our article, we hope you have a perfect solar fan choice. All the fans are suitable for maintaining enough ventilation, especially in the summer and humid areas. You don’t have to worry about your battery draining as long as the sun is out with the solar fan. Overall, our recommendations are: 

If you are running on a budget, consider building your own tent air conditioner. We have detailed the step by step on how to build a DIY tent AC in this post. 


Happy summer camping!

How hot is a campfire? We answer in this article.

A campfire might be a good alternative for tent heaters. They might provide you with warmth and create a cozy environment for a scenic outdoor night. After a long day, setting up a fire to relax and enjoy a conversation with friends and family is a great idea. But how hot is a campfire?

The temperature of a campfire can range from approximately 900°F (~482°C) to 2000°F (~1100°C). The final warmth level will depend on many things, such as the type of fuel used, the amount of available oxygen, and the fire’s size.

Curiosity: The temperature of 2000°F (~1100°C) is above the melting point for various metals, including aluminium, copper, gold, and silver. 

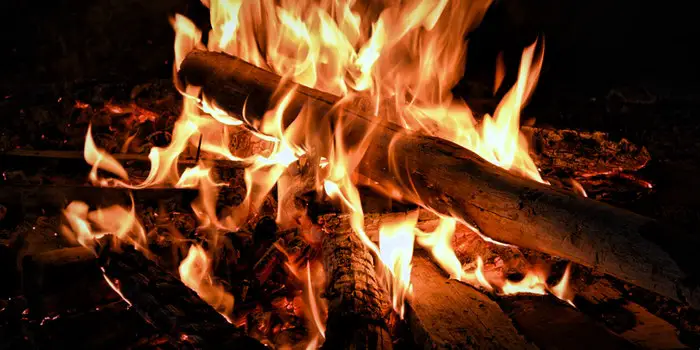
how hot is a campfire

What impacts the temperature of a campfire?

Element 1 - The Type of Fuel

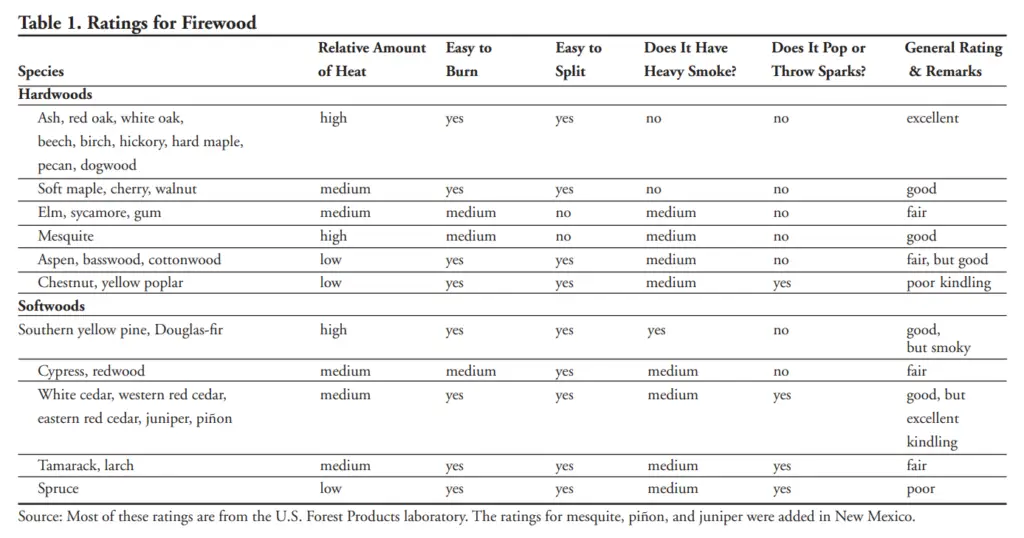
There are multiple fuel options to create your campfires such as propane, natural gas, and firewood. Virtually speaking, they all can reach 2000°F (~1100°C). Each of them comes with benefits and drawbacks. Let’s have a look! 

Fuel Source 1 - Propane Campfire

You should probably consider buying a portable propane fire pit if you are camping. There are multiple advantages associated with it:

·       You don’t need to collect/have firewood or even dry it out

·       They produce smokeless flame, which is considerably better for your eyes and respiratory system

·       Once you start It, you don’t need to keep “feeding” it with more wood

·       They usually come with safety devices, such as buttons to create and extinguish the fire


On the other hand, you might need to continuously monitor your propane tank and check fuel levels to ensure that your fire continues. Furthermore, propane fire is not ideal for cooking and roasting (note: you can still use it for cooking, but remember that they are not the best option for it – woodfire would be a better choice).

Hence, if cooking is the main reason for your campfire, there are better alternatives (woodfire).

Fuel Source 2 - Natural Gas Campfire

Natural gas fire pits is also another alternative. However, using them while camping might become impractical as you probably will need gas pipes and infrastructure to feed the fuel into your equipment. 

The advantages of natural gas fire pits are numerous: easy to start the fire, and no smoke or ash production. Similarly to propane fires, they are not ideal for cooking or roasting but can still be used.

Fuel Source 3 - Wood Campfire

Wood was the first energy and fuel resource used by man. Even though its application has declined over the last centuries with the arrival of new resources, campfires are still widely used today. 

The advantages of a campfire are numerous, such as:

  • Low cost – wood can be collected at virtual no cost, and it is a cost-effective solution for warming your night
  • The quality of heat and ambience is exceptional
  • You do not rely on energy resources
  • Your meal will be chemical-free and have a unique smoky taste. 
  • Setting a wood campfire is a fun activity that can be utilized as a social activity. 
  • It might be considered an eco-friendly solution depending on the wood use (renewable/from re-forest). 

On the other hand, wood campfires come with some drawbacks as well: 

  • It might become messy, and you might need to chop the logs. 
  • You will need to store and periodically feed the fire with wood to keep the flames going
  • It might be challenging to set a fire on wet days (wet wood)
  • Woodfires might induce pollution and breathing problems, depending on which wood quality

Element 2 - How oxygen will impact on a campfire temperature?

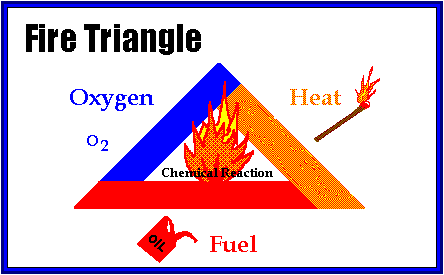
Fire is a consequence of a chemical reaction between oxygen and fuel (natural gas, wood, propane). Four factors are required at the same time to produce fire: 


·       Oxygen for combustion

·       Fuel (wood, natural gas, propane, gasoline, etc.) 

·       Heat to raise fuel temperature to its ignition temperature 

·       The chemical reaction that initiates a fire

Overall, oxygen enable things ignite at a lower temperature, making the burn faster and hotter. Therefore, theoretically, the more oxygen you have available, the hotter it will get. 

That is why we blow air in the fire – to help its ignition and burning speed. 

Element 3 - The size and fuel of the fire

According to physics.stackexchange.com,  a bigger fire does not necessarily translate into hotter burning. However, it might help to insulate the core of fire from the cold and consequently make it last longer. If more fuel is introduced to the fire, the temperatures might get higher. 

FAQ

What is temperature of campfires?

The temperature of a campfire will vary according a number of variables. Overall, it can range from approximately 900°F (~482°C) to 2000°F (~1100°C). 

What is the best fuel for campfires?

The answer is: it depends. Overall, we assume that having a natural gas fire pit will not be possible in most campgrounds (gas fire pits are more prone to backyards or places with adequate infrastructure).

Hence, if you are looking for an accessible alternative that does not produce smoke, stick to propane pit options. There are multiple portable alternative options these days – check it on amazon.

Alternatively, if you are planning to cook meals and enjoy the ritual of setting a fire (collecting wood, drying it out), woodfire options should be your choice.

Alternatively, if you are planning to cook meals and enjoy the ritual of setting a fire (collecting wood, drying it out), woodfire options should be your choice.

What is the best campfire fuel for cooking?

Whilst you can theoretically cook with propane, gas, and woodfire options, we recommend using wood logs. The burning fire coming from them will create a unique ambience and provide your meal with a tasty smoky flavour and aroma.

The unique taste delivered by woodfires results from flames breaking down wood’s organic components. The woodfire smoke penetrates the food, resulting in a delicious dish.

What is the best firewood option?

After reading multiple resources, we found an interesting article produced by the New Mexico State University. It details some firewood facts, including a table summarizing the rating for different wood types when considering their capacity. Overall, Ash, red oak, white oak, beech, birch, hickory, hard maple, pecan and dogwood are excellent alternatives.

Source: https://aces.nmsu.edu/pubs/_g/G102.pdf

How do I build a fire?

This interesting video from Rei.com shows in detail the step-by-step on how to build a fire. 

What is the best way to burn wood, in a fireplace or a stove?

Overall, according to an article from the New Mexico State University, stoves are more effective and give three times the heat as a fireplace does. Regardless of your choice, bear in mind that both should be cleaned regularly (at least once per year). 

How can I measure my campfire temperature?

We recommend you use an infrared thermometer. They are very easy to use and cost less than $30 (depending on the model). We have a Etekcity Infrared Thermometer 774, which is very robust and easy to use.  

Can I safely Roast Marshmallows Over A Gas or Propane Fire Pit?

Yes, there are no problems with it. You can use either gas or propane campfires to roast your marshmallows.

What type of firewood produces the least amount of smoke?

The table above details that ash, red oak, white oak, beech, birch, hickory, hard maple, pecan  dogwood, soft maple, cherry and walnut do not produce heavy smoke. 

How long does a propane tank last on a fire pit?

A 20Lb (9.1 kgs) propane tank can last from 4 to 9 hours. It will depend on the amount of fire output required.

Can I use gasoline to start my campfire?

As tempting as this might be, we highly recommend you AVOIDING use gasoline to start a campfire. Gasoline is highly flammable and, if not handled properly, can cause a significant accident. Therefore, DO NOT use it.

How to light my campfire?

The video below gives excellent tips when it comes to lighting your campfire – have a look at it! 

Some tips:

a) Before starting, check whether there are any fire bans in your area

b) Use a fire pit / fire ring to help with air flow protection

c) For fire starters, you can use cotton, newspaper, dryer lint, or even corn chips

d) Use first small kindling to start it

d) Progressively switch over to larger wood pieces. 

Is it important to extinguish a campfire? How do I do it?

It is very important to extinguish your campfire and ensure that re-ignition does not happen. The best way to do it is by drowning it with water. 

How can I heat my tent without a campfire?

Conclusion

As seen, the temperature of a fire can reach up to 2000°F (~1100°C). Overall, fires are influenced by: the type of fuel used, presence of oxygen, and fire size. 

If you plan to use your campfire to heat yourself on winter days, consider using natural gas and propane alternatives since they are easy to handle and maintain (you can also use a tent heater). 

On the other hand, if you plan to use your campfire for cooking meals, woodfires might help you with that particular smoky taste.