The Camping Air Conditioner

air conditioner for camping

Can you install a mini split AC in an RV? (How to do it!)

If you are an RV camper, you probably also face some challenges during summer camping – it might be the that the existing ac unit in your vehicle does not provide you with the required cooling capacity, and your car might get too hot with warm air trapped inside it.

How to solve it? Easy – install a mini split AC unit on it. But can you do it?  Yes, you can install a ductless mini split AC unit and keep the interior of your vehicle cool!
Can you install a mini split AC in a RV

By the way, The Camping Air Conditioner is sponsored by readers. When you buy through one of our links, we may earn an affiliate commission at no extra cost to you.

With units starting from 9,000 BTUs, multiple options are available in the market. Let’s further understand the points you should consider when buying and installing a cooling unit in your vehicle.

What is a mini split AC?

Mini-split ACs are ductless cooling systems that have been used in numerous air refrigerating approaches for houses, buildings, and other structures, such as tiny houses (most of them include heating mechanisms as well).

They comprise two separate parts: an indoor unit that blows the cold air inside the chosen environment and an outdoor unit that is responsible for the air conditioning process. 

The  ductless system comes with several advantages, such as:

  • Ease of installation
  • Less energy consumption 
  • Compact size
  • More efficient than rooftop units
  • Most of them already come with inverts

On the other hand, they also present some drawbacks:

  • It is not advantageous for large scale cooling requirements (A central air conditioning system will be more effective for larger areas)
  • The indoor unit is apparent and might impact the aesthetics of your RV
  • If you are not experienced, you might need the help of a professional to install it (a custom installation might be required). 
  • They might require more frequent maintenance

Is it worth installing a mini-split AC in my RV?

In a short answer, yes, it is. These devices are compact and ideal for RV campers.

You can quickly adapt a wall mounting (see on the right) bracket for a mini-split ac to your vehicle and position the outdoor unit with it.

 As for the internal piece, you can use the same procedures that you would use to fix it in a wall (check the installation instruction and requirements to confirm that your RV laterals will support the device’s weight).

Further, as previously discussed, most of the units already also come with heating functions, ideal for winter camping. 

We summarised the main advantages and disadvantages of installing a mini-split AC in your RV below. 

Pros
  • More efficient than a Rooftop device
  • Lower power consumption
  • Heating/Cooling features 
  • Lower noise levels
  • Relatively easy to install 
Cons
  • Might need professional help for installation
  • Can be pricey
  • Internal space might be an issue
  • Will increase weight in your RV (higher fuel consumption)
  • Might require more maintenance 

Which mini-split AC size should I pick for my RV?

It depends on the size of your RV – Overall, We suggest something from 30Btu to 40Btu per square foot as a rule of thumb. 

With RVs ranging from 250 to 400 square feet, which consequently would require units from 7,500 to 16,000 Btu. As guidance, we recommend the following:  

SizeAreaBTU (recommended)
Small RVs250 to 300 sq ft9,000 BTU
Medium RVs300 to 400 sq ft12,000 BTU
Large RVs400 sq ft and above18,000 BTU

In general, RV’s insulation is not the greatest, most of them being built with aluminium, steel, and wood. Steel and aluminium tend to retain heat, increasing the temperature of your cabin.

Therefore, we suggest always being conservative and choosing a unit with a higher cooling capacity.
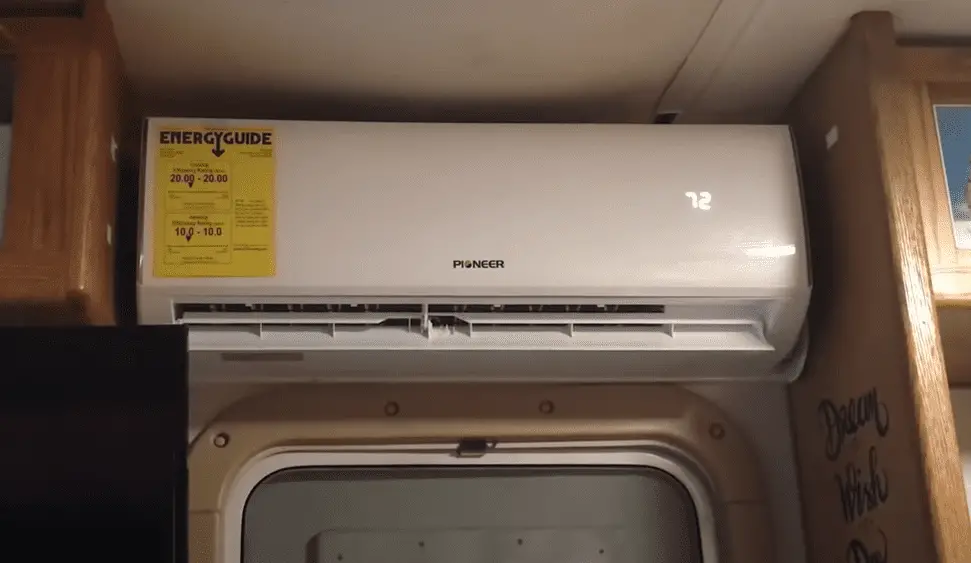
mini split ac in a rv

Our Product Recommendations

We have researched the market to see what products would suit RV better, considering ease of installation (we advise taking professional help), value for money, energy efficiency, noise levels (below 40dB) and size. 

After our review, our product recommendations are: 

Small RVs
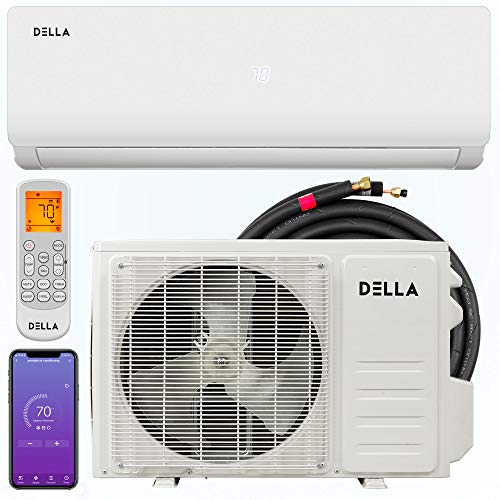
DELLA 9,000 BTU Mini Split AC
  • Compact size
  • Heating/Cooling system
  • Low noise levels (30-40 dB)
  • Installation kit included
Medium RVs
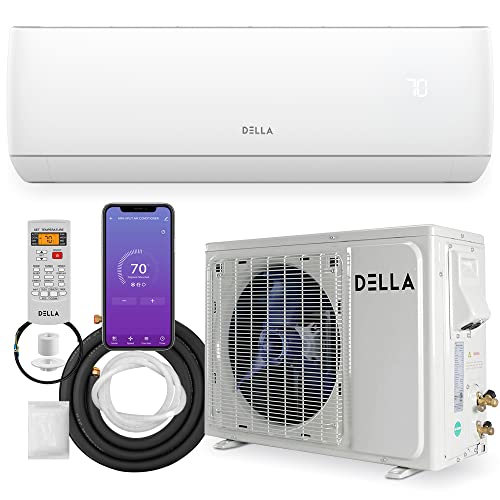
DELLA 12,000 BTU
DELLA 12,000 BTU
  • Ductless system
  • Wi-fi integration
  • Low noise levels (34.5dB)
  • Installation kit included
Large RVs
Cooper & Hunter 18,000 BTU
  • Ductless Mini Split AC / Heating 
  • Easy installation (kit included)
  • Low noise levels
  • Extended warranty

What to consider when installing a mini split AC in your RV?

Installation position

If you have a small RV, you might face some challenges to install your device. Overall, we recommend the following:

  • Position in the highest area of the RV (but leave at least 10 cm clearance to the rooftop)
  • Similarly, leave some clearance (at least 10cm) to RV walls
  • Preferably do not install it close to the door or windows because these areas might have less structural strength, and cold air might escape easily with people’s movement. 

Power Consumption

The last thing you want is having power supply issues in your camper van in the middle of your trip. 

Hence, ensure that you RV is able to support the power (average consumption varies in accordance with your model) and check the voltage requirements (110-230V) of your mini split AC unit.

Noise Levels

Preferably select units with noise leves below 40dB or you might have problems in sleeping. 

FAQ

Can I use a portable AC in my RV?

Yes, there are no problems with it.  In fact, they might a perfect option if you don’t have enough space to install in your vehicle, don’t want to install a split AC or just want to use the device in other areas.

Our recommend portable AC product is Whynter Elite, which comes with different cooling outputs. 

How to install the mini split AC in my RV?

This video below shows a step by step approach to installing a mini-split ac in an RV – it is long but worth watching if you are considering it.

Note: Unless you are a tool and air conditioning savvy, we recommend taking some professional advice to adapt your vehicle.

Conclusion

A mini-split AC might dramatically help you during summer camping. The ductless options come with numerous advantages for RV campers, such as:

  • Ease of installation
  • Less energy consumption 
  • Compact size
  • More efficient than rooftop units
  • Presence of inverts

Before picking your mini-split AC unit, ensure that you pick the most suitable unit, check power requirements, and space proof your vehicle.

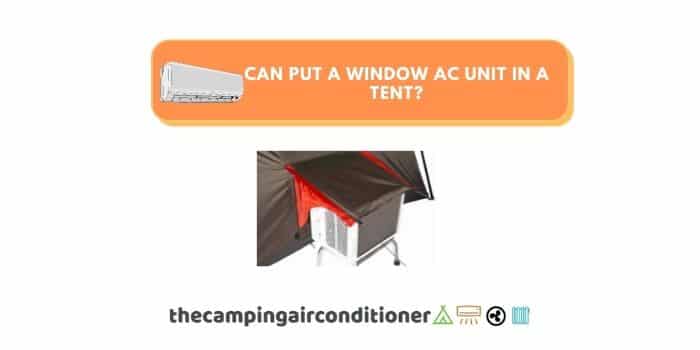
Can you put a window air conditioner in a tent?

We all know how hot tents can get when scorching on summer days. If you plan to camp in a large group, you have probably wondered whether you can put a window AC unit in a tent, right?

We have good news – yes, it is possible to install a window AC unit in your tent and make camping days much more enjoyable. However, we advise you to keep reading this post to ensure you install and operate your equipment correctly.

can you put a window ac unit in tent

By the way, The Camping Air Conditioner is sponsored by readers. When you buy through one of our links, we may earn an affiliate commission at no extra cost to you.

Tips to choose and install the best window AC unit for your tent

We detailed several tips to help you choose and install a window AC unit in your tent. Check them below:

  • Choose the adequate size for your window AC unit
  • Insulate your tent
  • Implement safety measures
  • Consider a tent with an AC port

Tip 1 - Choose the adequate AC size (BTU)

There is no doubt – different campers will have different needs. If you are camping in small or medium-sized tents, other alternatives might better suit you, such as a mini camping ac or a  battery-powered tent air conditioner

A window AC unit will work better for large to family-sized tents or big groups of campers within a medium-sized tent. 

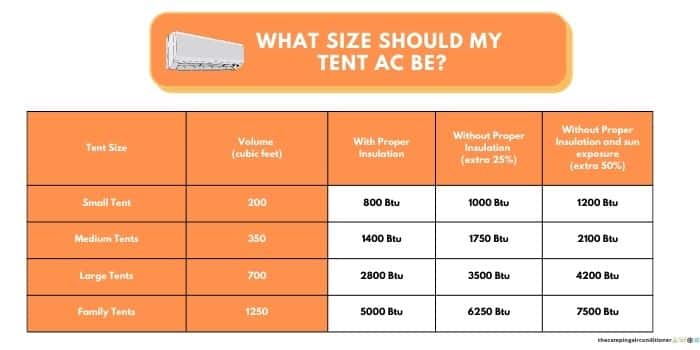
We undertook some studies (click here if you want to read it) and created a rule of thumb for air conditioning requirements for your tent. Roughly, you will need: 

  • Tents with adequate insulation will need at least 4 BTU per cubic feet.
  • Tents without proper insulation will require at least 5 BTU per cubic feet 
  • If your tent is exposed to the sunlight and has no insulation, we recommend at least 6 BTU per cubic feet

Overall, large-to-family sized tents range from 700 to 1500 cubic feet, implying cooling requirements from approximately 3,000 Btu up to 10,000 Btu depending on insulation conditions, the number of campers, exposure to the sunlight. 

The table below summarizes our findings in our preliminary studies. 

Size Volume (cubic feet) Insulated Tent No insulation (1.25X) No insulation and sun exposure (1.5X)
Small Tents 200 800 BTU 1000 BTU 1200 BTU
Medium Tents 350 1400 BTU 1750 BTU 2100 BTU
Large Tents 700 2800 BTU 3500 BTU 4200 BTU
Family Tents 1250 5000 BTU 6250 BTU 7500 BTU

Don’t forget to also take into consideration the weight and dimensions of the equipment to make sure it fits your tent and is easy to transport. 

Tip 2 - Insulate your tent

After finding the most suitable unit for your tent, it is time to think about insulation. The insulation will help you save energy (by choosing a smaller device) and improve AC cooling performance.

The main reason to insulate your tent is to create a physical barrier to avoid cold air escaping from inside your tent and hot air getting into it. 

How do you do it? You can it with the following gear/material:

  • Use a tent tarp (heavy-duty versions)
  • Use  Duct tapes  and/or Pool noodles to extinguish any cold air leakage
  • Insulate your tent floor
  • Cover your tent with thermal blankets
 We have detailed a long article with quick and easy tips to guide you on how to do it – click here to read it.

Tip 3 - Implement safety measures

Even though window AC units are very safe these days, you should pay attention to some safety requirements and measures to avoid potential risks, such as:

  • Use an adjustable platform to avoid direct contact with the ground/soil. If you don’t want to spend money with a pre-fabricated solution, you can put the AC device above wood pieces.
  • Make sure that all electrical cables are properly connected and insulated. If possible, bury them in the ground to avoid potential tip-over incidents or use cable covers. 
  • Ensure that the equipment has a drainage tube and is slightly inclined towards the outside area to avoid water inflow (you don’t want water flowing into your tent!). 

Adjustable platform 

Cable covers

Tip 4 - Consider a tent with an AC port

Some tents already come with AC ports to facilitate equipment installation and operation these days. We reviewed the best tents with ac ports in the market in our opinion in this post. In summary, we recommend the following: 

Ozark Trail  12-Person 3 Room
  • AC port 
  • Capacity - 12 campers
  • Sets up in under 2 minutes
  • Good Value for money
WHITEDUCK Avalon Canvas Bell Tent
  • Luxury design and ample internal room 
  • Excellent breathability
  • Top-notch insulation
  • Canvas made

Best window AC units for a tent

After reviewing the options available in the market, we selected three models to consider when buying your window AC unit for your tent.  To arrive at these options, we took into account:

  • Price / Value for money
  • Cooling Capacity 
  • Portability and ease of installation

Our preferred models are:

Best Value For Money
LG 6,000 BTU 115V
Budget Friendly
Midea 5,000 BTU
Best for family tents
Midea 12,000 BTU

What are the alternatives to cool my tent?

Well, you might also get a refreshing breeze inside your tent with  alternatives to a window AC unit, such as:

Ideal for small tents
Evapolar evaCHILL
Ideal for Medium Sized Tents
EENOUR QN750
Ideal for family tents
BLACK+DECKER 8,000 BTU
Features 1) Evapolar Evachill 2) Eenour QN 750 3) BLACK+DECKER 8,000 BTU Portable AC
Weight 0.910kg 12.9kg 23kg
Dimensions 6.5 x 6.5 x 6.5 inches 29.5 x 14.9 x 13.6 inches 17.32 x 13.2 x 27.2 inches
BTU N/A – Evaporative Cooler 2900 Btu 8000 Btu
Wattage 7W 250 W 860W
Battery Compatible? Yes – 5V Yes – 240V No
Battery Operated? No Yes (compatible) No
USB compatible? Yes No No
Noise Levels Max 50 dB Max 58dB (lower 45dB) 52dB
Tent size? Small Medium Family-sized tents
Investment $ $$$ $$

Alternatively, if you are into the DIY approach, there is an easy and cheap version for your – it costs less than $100 and works good (as long as you have ice available) – check a detailed step by step guide in this post:

Not happy with all the options shown above? Well, learn how to cool your tent without electricity in this other detailed article from us:

FAQ

Can I DIY my tent AC port for a window AC Unit?

Overall, we DO NOT recommend it unless you are comfort to take the risk of damaging your tent permanently. If you want to try it by yourself, the video below details how to make it

Can I use a portable AC in my tent?

Portable ACs are a good and practical alternative for window AC units. They have evolved technically and provide similar cooling outputs to window-mounted options.

Is it safe to use a window AC in my tent?

Yes, there are no problems with it. Follow the installation instructions and implement basic safety measures and you will be fine. 

Conclusion

Using a window AC unit in your tent is a wise and safe alternative for camping summer days. Make sure that you choose the adequate model size and implement insulation and safety measures to make the most of it.

We hope this article has helped you find the best tent air conditioning option for you!

Happy summer camping.

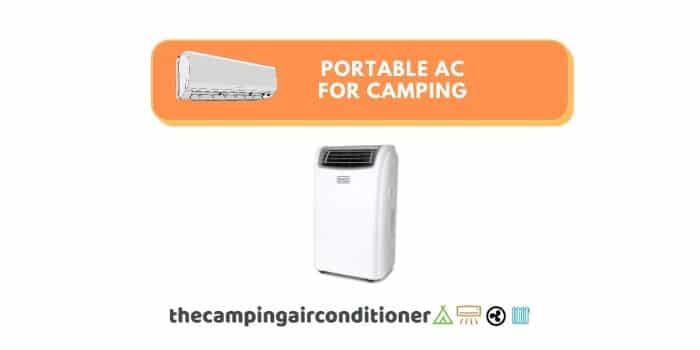
Portable Air Conditioner for Camping – Get your tent cooler!

Portable air conditioners are a convenient alternative for campers – they provide you with versatility and good cooling capacity. These devices have significantly improved over the last years and can offer good value for money compared to window ac units. 

However, you need to be careful when choosing them for your camping days. Before choosing your model, verify your tent size, cooling requirements, and which options best serve you. 

When considering a portable air conditioner for camping, you should pay attention at least to the following points:

  • Cooling output
  • Portability (preferably with rotating wheels)
  • Ease of use and installation
portable air conditioner for camping

How to choose your camping air conditioner?

When choosing your tent air conditioning options, you should first assess several aspects: the tent’s size, tent’s shape, tent insulation, exposure to the sun, and many others. 

We undertook detailed studies on which air conditioning size (BTU) you should pick for your tent. Overall, we recommend the following:

This is based on a a rule of thumb that we created based on our studies: 

  • Tents with adequate insulation will need at least 4 BTU per cubic feet.
  • Tents without proper insulation will require at least 5 BTU per cubic feet (25% extra power required)
  • If your tent is exposed to the sunlight and has no insulation, we recommend at least 6 BTU per cubic feet (50% extra power required)
 

Note: These are indicative numbers based on our experience, and exact requirements will vary in accordance with many other factors. These ratios should be used only as guidance. 

Portable Air Conditioner For Camping - Review Summary

Taking into consideration these features, we have chosen the following products as our preferred options in the market:


BLACK+DECKER Portable Air Conditioner – 8,000 Btu – Best Overall – Our choice

Whynter Elite ARC-122DHP 12,000 BTU – Best option for Family-sized tents

Portable AC for camping - Review of the top 4 products

BLACK+DECKER Portable Air Conditioner

BLACK+DECKER BPP08HWTB  is our preferred option for a portable ac unit for camping. It also has heating mechanisms, apart from its cooling features, making it perfect for both summer and winter camping. .

Its adjustable fan speeds and air swing up and downs modes, it cools the air to 61 degrees Fahrenheit at the coolest setting and heat up to 88 degrees Fahrenheit.

Measuring 13.2 x 17.32 x 27.2 inches (33.5 x 44 x 69cm), the equipment has wheels and handles that facilitate its transportation. Depending on your tent size, you can choose between a 5000 and 1000 Btu option. This model also comes with a remote control that allows for air temperature adjustment for your convenience.

Relax – BLACK+DECKER BPP08HWTB only produces 54dB in the sleeping mode, ensuring a relaxing and cozy night if you are worried about noise levels. 

Its washable filter makes maintenance effortless – you can slide it out twice a month, rinse under running water, and place it back

Why this is our preferred option?

This model is super convenient, easy to operate, and carry around. It comes with different BTU outputs which will suit whatever tent size you have. 

Further, it has a 4-in-1 functionality (cool, fan, dehumidifying, heater), which makes it the option with best value for money in our opinion. 

To finalize, BLACK+DECKER is broadly known for its high quality and durable products and it offers the best value for money option in our opinion. 

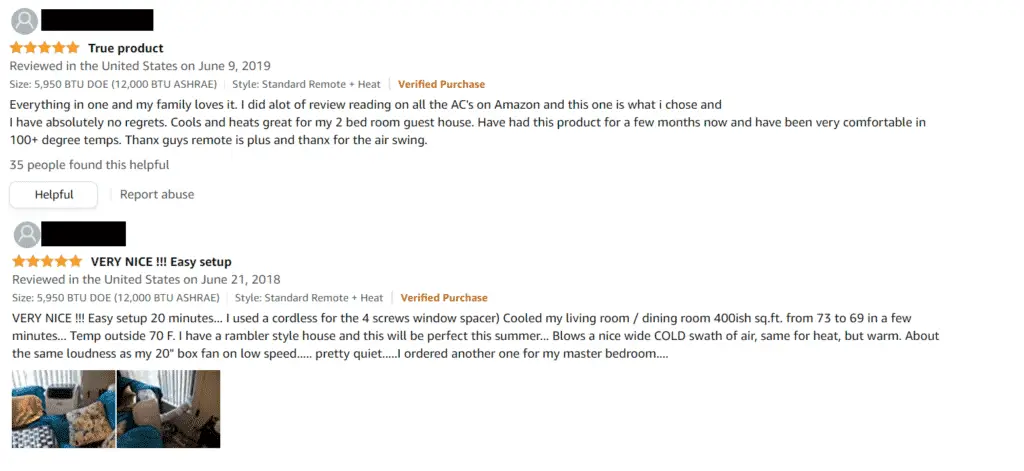
Some of the customer’s review are detailed below. 

portable ac for camping - customer review

Pros

  • Ideal for mid to large sized tents
  • Durability
  • Easy to clean and maintain
  • Eco-friendly refrigerant

Cons

  • Size might be inconvenient for middle-sized tents.
  • You will need to adapt the air exhaust hose to your door (it is very simple, though)

Honeywell 8,000 BTU Compact Portable Air Conditioner - Budget Friendly Option

Honeywell 8,000 BTU Compact Portable Air Conditioner is our budget-friendly alternative for portable AC units for camping. 

You can find cheaper options in the market, but all of them come with durability concerns. 


The Honeywell 8,000 BTU Compact Portable Air Conditioner comes with wheels that facilitate movement inside the tent and transportation during your camping trips. Conversely to our preferred model, Honeywell portable ac does not come with heating options, and, therefore, you will not use it outside summer days. 

Measuring 16.3 x 13.6 x 28 inches, the device weighs approximately 60 pounds (27kg), which is considered bulky in our opinion. Even though the manufacturer says its noise level is limited to 52dB, some customers have reported noise complaints. 

The equipment is designed for quick set up and installation, and it is easy to operate with remote control and wi-fi option (wi-fi options come at an extra cost). 

It comes with a washable filter, which has easy maintenance. The portable ac is equipped with a dual drainage option that offers you flexibility (drain pan and drain tube).

Pros

  • Budget-friendly options
  • Easy to operate and set up
  • Wi-fi option available
  • Easy maintenance

Cons

  • There have been complaints with noise and water leakage
  • Does not come with heating function
  • Bulky

Whynter Elite ARC-122DHP 12,000 BTU - Best option for Family-sized tents

Whynter Elite ARC-122DHP 12,000 BTU is another alternative for your portable ac for camping. As with the Black+Decker model, it comes with cooling and heating functionalities increasing its versatility. 

The equipment has a patented auto drain function that exhausts water automatically in most cooling and dehumidifying modes – do not expect leakages with this device. 

Its 12,000 BTU output will suit family-sized tents (10+ campers) and cool down the camping environment. This portable air conditioner uses non-ozone-depleting refrigerant with an eco-friendly approach.


It comes with remote control, which allows speed, temperature, and dehumidifying level adjustments from a distance. Whilst it provides significant cooling capacity, its dimensions are similar to products with less power – 16 x 17 x 29.5 inches.


Customers have positively reviewed its noise levels, reporting that compressors are extremely quiet and far lower than anticipated.

Pros

  • Eco-friendly
  • Ideal for family-sized tents
  • Low noise levels
  • Compact
  • Good sealing and exhausting mechanisms

Cons

  • More expensive than other alternatives
  • Oversized for medium tents
  • Does not come with wheels

FAQ

I have a small tent. Which tent AC model should I pick?

For small tents, we recommend battery powered ac units or evaporative coolers. From our expertise, we recommend the products below:

How can insulate my tent for AC?

We prepared detailed tips on how to insulate your tent for an AC, which includes: 

  • Covering your tent with a tarp
  • Using duct tape and/or pool noodles to remove potential air leakages
  • Insulating the floor of your tent
  • Covering your tent with thermal protection
  • Picking the right tent fabric
  • Use a tent which already comes with AC ports
These tips are further detailed in the article below. 

Suggested Article

How to cool down my tent without electricity?

We suggest taking the following measures:

  • Pick the adequate tent fabric.
  • Choose the best location to pitch your tent
  • Set your tent up at the right time and if possible disassemble it during the day
  • Use battery and solar-powered devices
  • Cover your tent with reflective blanket.
  • Cool your body down
  • Watch for tent ventilation.
  • Forget about your sleeping bag
  • Build a DIY Tent Air Conditioner
If you want to check further details around each tip, read this article. 
Verdict

You can definitely improve your summer camping experience with a portable air conditioner. After thorough market research, we reviewed the three options that we believe will suit your camping needs:

Our assessment took into account portability, cooling capacity, price, and product durability.

Our preferred option the Black+Decker model, given its great value for money, quality and versatility – you can easily suit it in mid to family sized tents and use the device in both summer and winter (it comes with heating and cooling options). 

BLACK+DECKER Portable Air Conditioner – 8,000 Btu – Best Overall – Our choice

Happy camping adventures!

How to air condition a tent? (It is easier than you think!)

Summer is campers’ preferred season – parks are packed, there is plenty of daylight, playful alternatives for kids, and dogs and pets also love it.

 However, all of this joy comes with a challenge – boiling weather! So a natural question comes in mind – How to air condition a tent? 

There are multiple ways to air condition a tent, such as: 

  • Using portable ac units
  • Using a window AC equipment with an adequate tent
  • Using battery-powered devices if you are camping off-grid 
  • DIY Tent AC

We note that you will also probably need other camping gear and accessories to improve the performance of your preferred option and AC device. 

Let’s go into detail and further explain how to use each air conditioning solution for your tent  below.

how to air condition a tent

By the way, The Camping Air Conditioner is sponsored by readers. When you buy through one of our links, we may earn an affiliate commission at no extra cost to you.

How to air condition a tent?

To facilitate your understanding and implementation, we have prepared a detailed guide. In summary, we have the following steps: 

  • Step 1 – Check which equipment size/output you need (BTU)
  • Step 2 – Choose the equipment suits your camping conditions better.
  • Step 3 – Prepare your tent for your AC device
  • Step 4 – Insulate your tent
  • Step 5 – Turn on the equipment and enjoy the cold breeze

Step 1 - Check which equipment size/output you need (BTU)

The AC size or power output required will depend on many factors, such as:

  • Tent size
  • Tent insulation
  • Exposure to the sun
  • Weather conditions
  • And many others. 

According to our studies and experience,  you should be fine with the following ratios:

  • Tents with adequate insulation will need at least 4 BTU per cubic feet.
  • Tents without proper insulation will require at least 5 BTU per cubic feet (25% extra power required)
  • If your tent is exposed to the sunlight and has no insulation, we recommend at least 6 BTU per cubic feet (50% extra power required).
If you want to understand further about these numbers, we recommend reading this article. In summary, we created the table below as a guidance.
SizeVolume (cubic feet)Insulated TentNo insulation (1.25X)No insulation and sun exposure (1.5X)
Small Tents200800 BTU1000 BTU1200 BTU
Medium Tents3501400 BTU1750 BTU2100 BTU
Large Tents7002800 BTU2500 BTU4200 BTU
Family Tents12505000 BTU6250 BTU7500 BTU

Step 2 - Choose which equipment suits your needs better

Now that you know how many BTUs are required to refrigerate your tent, you need to choose the most suitable option for you. Apart from the cooling outputs, you will also need to consider:

  • Power input (battery-powered x electricity-powered x DIY option)
  • Weight, size, and portability
  • Price

There is no better or worse option, but the ones that will suit you the most. 

For example, are you camping in a big group with electrical infrastructure near your tent? We recommend going for a window AC unit.

Are you solo-camping or camping in a remote location? A compact cooling device will suit you well, such as Evapolar Evachill. Overall, we recommend the following options (check comparison table below):

Ideal for small tents
Evapolar evaCHILL
Ideal for Medium Sized Tents
EENOUR QN650 - 2350 Btu
Ideal for family tents
BLACK+DECKER 8,000 BTU
Features 1) Evapolar Evachill 2) Eenour QN 650 3) BLACK+DECKER 8,000 BTU Portable AC
Weight 0.910kg 14kg 23kg
Dimensions 6.5 x 6.5 x 6.5 inches 21.3 x 8.78 x 11.73 inches 17.32 x 13.2 x 27.2 inches
BTU N/A – Evaporative Cooler 2350 Btu 8000 Btu
Wattage 7W 200 W 860W
Battery Compatible? Yes – 5V Yes – 24V No
Battery Operated? No Yes (compatible) No
USB compatible? Yes No No
Noise Levels Max 50 dB Max 64dB (lower 44dB) 52dB
Tent size? Small Medium Family-sized tents
Investment $ $$$ $$

Step 3 - Prepare your tent for your AC device

If you have chosen a window AC unit, we recommend picking up a tent with an AC port. We have reviewed multiple options in the market, and WhiteDuck Avalon is our preferred model, offering plenty of space and comfort (but at a significant investment – around $900). 

If you are on a budget or simply do not want to invest in a luxurious model, you can check some alternatives here, but our preferred family-camping budget-friendly model is Ozark Trail 16×16-Feet 12-Person Instant Tent 

Ozark Trail  12-Person 3 Room
  • AC port 
  • Capacity - 12 campers
  • Sets up in under 2 minutes
  • Good Value for money

If you have picked a portable AC unitbattery-powered device or DIY option, make sure that there is enough space for the equipment inside your tent. Some tips that you should consider before pitching it:

  • Choose a smaller tent (you will have less air to be refrigerated)
  • Choose the best location to pitch your tent  and avoid excessive sun exposure – check our tent uv protection guide)
  • Set your tent up at the right time (if possible, avoid leaving your tent assembled during the day – hot air might get trapped)
  • Watch for tent ventilation – pitch your tent in an open area with plenty of ventilation and tree shade.
  • Forget about your sleeping bag – Don’t use o winter sleeping bag (a yoga mat or inflatable mattress might be a good alternative). 

Step 4 - Insulate your tent for AC

Regardless of your preferred option, it would be best if you considered insulating your tent to improve your equipment’s performance

The last thing you want is to bring your ac to your trip and see that it is not cooling your tent down because of the tent’s insulation. How can you insulate a tent for an AC?

 Easy – we have prepared special and easy tips for you in this article, but in summary you should:

  • Use a heavy-duty tent tarp
  • Use Duct tapes  and/or Pool noodles  to suppress any air leakage points
  • Insulate your tent floor
  • Cover your tent with thermal blankets
  • Consider an insulated fabric for your tent, such as canvas.

Step 5 - Turn on the equipment and enjoy the cold breeze

Connect the equipment to the power and turn it on – that is it – You are ready to have a cozy night!

A Couple of final suggestions and points to consider:

  • Keep your tent doors close while you have the equipment turned on to maintain the cold breeze inside it
  • If possible, disassemble your tent during the day to avoid warm air retention
  • Overall, canvas tents, such as Kodiak Basic Canvas (shown below), have better breathability and insulation features. 
Kodiak Basic Flex-Bow Quick Set Up
  • 4-season tent with optimal insulation
  • Quick and easy set-up
  • EXCELLENT Value-for-Money
  • Up to 6 campers

FAQ

How do I add ac port to my tent?

Overall, we DO NOT recommend adding an ac port to your tent if you don’t have any prior experience – you might permantly damage it.

If you can handle scissors, duct tapes, and special glue well and want to try it, the video below show a step-by-step guide. 

Conclusion

Air Conditioning a tent is easier and cheaper than you think. You won’t need to spend too much time and money to improve your summer camping days. 

However, ensure that you have the proper equipment and gear to allow a comfortable trip. Following the five steps mentioned above, you will not have any problems in refrigerating your shelter:

  • Step 1 – Check which equipment size/output you need (BTU)
  • Step 2 – Choose the equipment that suits you better.
  • Step 3 – Prepare your tent for your AC device
  • Step 4 – Insulate your tent
  • Step 5 – Turn on the equipment and enjoy the cold breeze

If you have any doubts, please do not hesitate to contact us. 

Keep your tent warm with a kerosene tent heater!

Cold weather camping can be uncomfortable and dangerous when you don’t have the right heating gear. You risk hypothermia or frostbite that can lead to death. Luckily, camping enthusiasts have developed heating devices that ensure you are safe and comfortable.

Kerosene tent heaters are a good alternative for portable propane units. Compared to the latter, kerosene options offer less moisture and they are more efficient (produce approximately 47% more BTU per gallon), being ideal for a large group of campers within family-sized tents. 

Further, when we talk about value for money, they can be a cheaper solution depending on kerosene’s price (it is a distillate of crude oil, and, therefore, prices will vary following oil prices). 

kerosene tent heater

On the other hand, they require more maintenance and produce more gas emissions than propane heaters. The maintenance of kerosene heaters will include disposing of the remains of burnt fuel that accumulates during equipment usage.

Because of its high efficiency, you can probably find minor equipment that can heat larger areas when compared to propane devices.

We handpicked some options that might suit different camper needs:

Let’s go through a detailed review of each product below. 

Kerosene Tent Heaters - Product Reviews

Sengoku Heat Mate 10,000 BTU - Best Alternative

The Sengoku Heat Mate 10,000 BTU is a safe and economical way to heat your tent during the cold season. Other than camping, it is a good alternative in events of power failure at our homes. Among the best kerosene tent heater in the market, it is one of the models that can heat an area of up to 380 sq. ft.

This powerful tent heater from Sengoku has a maximum heat output of 10 000 BTU, making it a good option for large tents, poorly insulated rooms, and other hard-to-heat spaces. The kerosene heater has a fuel capacity of 1.2 gallons, enough to provide heat for 14 hours.

To make it hassle-free to operate, it has a simple push-button start and an EZ flame adjuster. Moreover, it includes an automatic shut-off that shuts the heater off when knocked accidentally or when low fuel level. Unlike some heaters that are hard to carry and store, this is one of the best kerosene tent heaters in the market and has a lightweight and compact design for easy carrying and storage.

Using the fuel gauge, you can easily see the fuel level and keep the heater running. It includes a manual siphon pump for quick kerosene transfer to the heater without any mess.

Pros

  • It has a heavy-duty construction with safety guard grills
  • Features a maximum output of 10000 BTU, and it can heat an area of up to 380sq.ft
  • The heater is safe to use, thanks to the included auto shut off
  • Good emergency heat source

Cons

  • None identified

RHXX Kerosene Heater - Budget Friendly Option

If you are looking for a kerosene tent heater, RHXX heater keep you warm in a cold tent, this kerosene tent heater is the best for you. It has a maximum calorific value of 10, 000BTU/H, consuming 0-2-0.25 L/h. It produces powerful heat that can warm a room of more than 25 square meters (270 sq ft).

The kerosene tent heater features a unique metal-burning chimney that allows the kerosene to burn well, heating faster and more efficiently. Still, the camping stove has an energy-saving design, where it has the effect of log fuel, no oil, no gas, and no smoke damage.

This tent heater has a combustion chimney made of metal that allows the kerosene to be burned completely and faster. The heating stove has a fuel tank capacity of 6.0L, and it comes with a storage bag for convenient carrying. It is light and small in appearance, meaning you can carry it anywhere, and it is suitable for fishing, hiking, camping, barbecue, and other outdoor occasions.

RHXX kerosene stove heater has a stainless steel construction that can resist rust and corrosion for long-lasting performance. Overall, with this kerosene tent heater, you can say goodbye to bulky heaters and start using this flexible tent heater.

Pros

  • It has a wide range of uses
  • Made from rust-resistant stainless steel
  • It can heat a room of up to 25 square meters
  • The stove is lightweight and convenient to use

Cons

  • Not ideal for medium to large tents

HKTK Portable Kerosene Heater - Best for Hiking and Backpacking

HKTK Portable Kerosene Tent Heater   is another quality device you can use during your next camping trip to keep you warm. It provides electric-free heat that can be relied on in emergencies. Other than heating a large area for long, it acts as an additional light source. The heater has a large oil tank that can hold up to 1.5kg, and it provides heat for 4-6 hours when the tank is full.

This is another quality kerosene tent heater you can use during your next camping trip to keep you warm. It provides electric-free heat that can be relied on in emergencies. Other than heating a large area for long, it acts as an additional light source. The heater has a large oil tank that can hold up to 1.5kg, and it provides heat for 4-6 hours when the tank is full.

When the fuel level is low, the wicks reduce heat output to prevent the heater from burning or causing accidents. It contains a total of 8 wicks that can be used for 7-8 months (depending on how often you use the stove). The wicks absorb kerosene faster, and they are efficient.

Even though it does not have heat settings, it has a control dial that adjusts the size of the flame and wicks. It is constructed from wrought iron material that can withstand harsh outdoor conditions without rusting. Besides, the stove has a sturdy base that keeps it in one position and prevents falling.

Most kerosene heaters have an auto shut-off feature; unfortunately, this one does not. Instead, the connection between the kerosene tank and upper parts is secure such that it will not spill kerosene even when knocked down. It also has a non-lift heat chamber that reduces the startup odor and allows you to light the wick safely.

Pros

  • Made from durable wrought iron
  • Simple to assemble and easy to use
  • Its no-lift up chamber reduces the startup smell
  • It is extremely light and compact (0.62kg)
  • Provides 360-degrees heat, allowing you to set it in the middle of your tent

Cons

  • It does not have heating adjustment settings 
  •  Not ideal for medium to large ize tents. 

Campy Gear Wiry 2-in-1 Portable Kerosene - Best Multi-function option

Campy Gear Wiry 2-in-1 Portable Kerosene Tent Heater b rings you this 2-in-1 heater and stove that will keep you warm during camping, backpacking, hunting, and ice fishing. It doubles as a cooking stove and heating equipment for your outdoor adventures.

The kerosene tent heater has a maximum output of up to 13 000 BTU, and it has a 20lb propane tank that offers 42 hours to the maximum, being suitable for large tents. 

It provides 360-degrees radiant heating that warms up your tent in all directions. Campy Gear kerosene tent heater has an adjustable flame control to adjust the frame level.

Furthermore, it is equipped with a tip-over switch that enhances safety in accidental tip-over. What’s more, an ODS switch shuts the unit off when low oxygen levels are detected in your tent.

This portable kerosene heater features a sturdy carrying handle that makes it simple to carry the stove anywhere. It includes a spark ignition that starts the stove in seconds with a simple click. You won’t require matches or a lighter. 

In addition, it has a foldable pot stand with a slip-resistant grip to hold various pot/pan sizes. You can cook your favorite meal while out there.


Pros

  • It has double-safety features that make it reliable to use in a tent
  • This is a dual-function camping gear
  • Lightweight and simple to use

Cons

  • The gas knob is fragile
  •  

FAQ

Can I put a kerosene heater in a tent?

Yes, there are no problems with it. However, you should monitor oxygen and monoxide carbon levels. Make sure that your devices have:

Suggested Article

Can I sleep with a kerosene heater turned on?

We DO NOT recommend you sleep with your propane or kerosene heater turned on. There are carbon monoxide poisoning, overheating, and tip-over risks, which should be avoided.

Propane vs Kerosene Heaters - what is the best?

Each option comes with advantages and drawbacks, and the best alternative will depend on your budget, preference, and camping conditions.

Overall, because of their efficiency, kerosene heaters are more suitable for larger tents with heating outputs up to 25,000 Btu, such as Dyna-Glo WK24BK (photo below). However, as detailed above, you can find different models with different heating outputs.


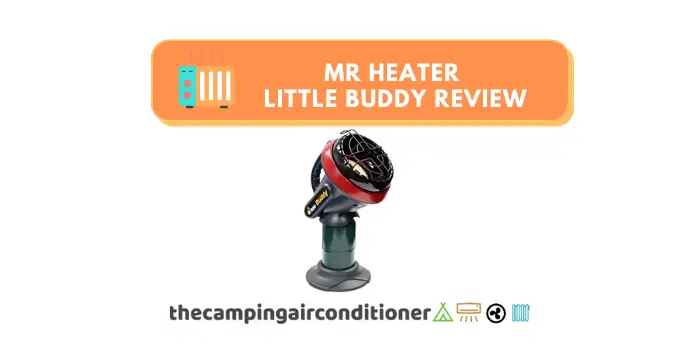
On the other hand, if you are camping in a small group or solo camping, we recommend looking at the Mr Heater Litte Buddy option. It is an incredibly efficient heater for small tents.

Suggested Article

How many BTUs do I need for my kerosene heater?

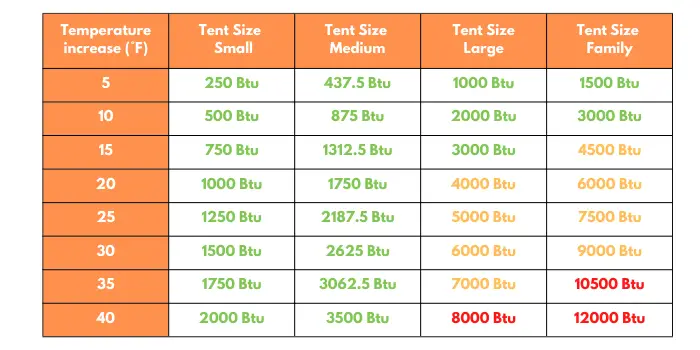
To answer this question, you need to know the dimensions of your tent and what is the desired temperature increase. We wrote an entire post with calculation details, and we recommend you read it (click here).

In short, we drafted the following table that serves as guidance.

tent heater size BTU

Verdict

Kerosene heaters are a great alternative to warm up a cold night during your camping days. After reviewing all the products in the market, we recommend Sengoku Heat Mate 10,000 BTU as the best alternative overall. 

Best Option overall – Lightweight and portable: Sengoku Heat Mate 10,000 BTU. (OUR CHOICE)

However, we understand that different campers have different needs. Therefore, we also think that is worth a look at the following options: 

Happy warm camping! 

What size AC do I need for a tent? We have the answer.

We understand that getting your first tent air conditioner might be a novelty. With so many models and options, which one should you pick? What size (BTU) do you need for a tent?

We have drafted this article to help you – to simplify the calculations, we created the campingairconditioner.com cooling rule, with the following principles:

  • Tents with adequate insulation will need at least 4 BTU per cubic feet.
  • Tents without proper insulation will require at least 5 BTU per cubic feet (25% extra power required)
  • If your tent is exposed to the sunlight and has no insulation, we recommend at least 6 BTU per cubic feet (50% extra power required)
All you need to know is your tent dimensions to calculate its area (square feet) and volume (cubic feet).
what size should be tent air conditioner be BTU

Note: these ratios are indicative only and were calculate based on different cooling references, such as: BTU Calculator Learnmetrics.com. The exact amount of BTUs required will depend on tent shape, material, insulation, weather conditions, number of campers and many other variables. 

How to calculate my tent area and volume?

These calculations are easy – you only need your tent dimensions:

  • Length
  • Width 
  • Height

With them, you calculate your tent floor are with the following formula. 

 Tent Floor Area = Length x Width

To find tent’s volume, you need to multiply the floor area by its height. 

 Tent Volume = Floor Area x Height

NOTE: All the dimensions should be in foot/feet.

Let’s use the CORE 12-person cabin model as a practical example. 

Its dimensions are:

  • Floor size – 11 feet x 16 feet –> Floor Area = 176 square feet
  • Height – 86 inch (1 inch = 0.083 foot) = 7.16 feet

The tent’s volume is calculated according to the formula below, and it is 1,260.16 cubic feet. Therefore, for this tent, you would need the following AC output: 

  • CORE 12-person cabin with insulation – approximately 5040 Btu
  • CORE 12-person cabin without insulation – around 6300 Btu
  • CORE 12-person cabin without insulation and exposed to the sun – about 6930 Btu 

Tent Air Conditioner output (BTU) x Tent Size

We have picked four different tent models to extend the camping air conditioner cooling rule to establish an indicative relationship between tent size and required AC output.

Dimensions:

82.7” x 82. 7” x 47.2”

 (6.88 ft x 6.88 ft x 3.93 ft)

Volume (cubic feet):

186.6 cubic feet

Dimensions:

9 ft x 7 ft x 4ft 11” 

(9 ft x 7 ft x 4.91 ft’)


Volume (cubic feet):

309.72 cubic feet

Dimensions:

16 ft x 9 ft x 6ft 2” 

(16 ft x 7 ft x 6.16 ft’)

Volume (cubic feet):

690.65 cubic feet

Dimensions:

11 ft x 16 ft x 7.16ft

Volume (cubic feet):

1260.16 cubic feet

According to these calculations and tent models,  we established the following metrics for each standard size:

  • Small tents have approximately 200 cubic feet
  • Medium tents have approximately 350 cubic feet
  • Large tents have approximately 700 cubic feet
  • Family Tents have approximately 1250 cubic feet
The table below gives you an indicative estimation of the amount of BTUs required to cool down your tent. 
Size Volume (cubic feet) Insulated Tent No insulation (1.25X) No insulation and sun exposure (1.5X)
Small Tents 200 800 BTU 1000 BTU 1200 BTU
Medium Tents 350 1400 BTU 1750 BTU 2100 BTU
Large Tents 700 2800 BTU 3500 BTU 4200 BTU
Family Tents 1250 5000 BTU 6250 BTU 7500 BTU

Tent air Conditioner - Recommendations

Based on the numbers shown above and models available in the market, we handpicked some models for you:

Small to Mid Tents  

Medium to Large Tents

For more details on how to use an AC in a tent, read this article

FAQ

How to cool down my tent without electricity?

Among several measures, we suggest taking into consideration the following items:

  • Choose the adequate tent fabric.
  • Choose the best location to pitch your tent
  • Set your tent up at the right time
  • Use battery and solar-powered devices
  • Use a reflective blanket.
  • Cool your body down
  • Watch for tent ventilation.
  • Forget about your sleeping bag
  • Build a DIY Tent Air Conditioner
If you want to check further details around each tip, read this article. 

What are the best tents for hot weather?

We reviewed couple of options available in the market and suggest you checking the following models: 

Which tent fabric is the best for insulation?

Canvas tents tend to offer better insulation and have outstanding breathability. 

Is there a best color for tents?

Overall, light colors will perform better in hot conditions given they retain less heat (you can read a detailed guide on how to choose your tent color)

Conclusion

We hope this helps you on choosing the most suitable tent air conditioner for you. 

Should you have any queries, please do not hesitate to contact us. 

DIY Tent Heater with 4 easy steps (candle heater)

During the winter season, there are many ways to heat your tent. You can either buy heating gear or go for a DIY option.

If you are running on a budget, a DIY candle tent heater is a great and reliable alternative that will keep your tent warm during winter days. There are many ways to make a DIY candle tent heater, and we created a simple step-by-step guide to help you build it.

tent heater diy

Tent Heater DIY - Summary

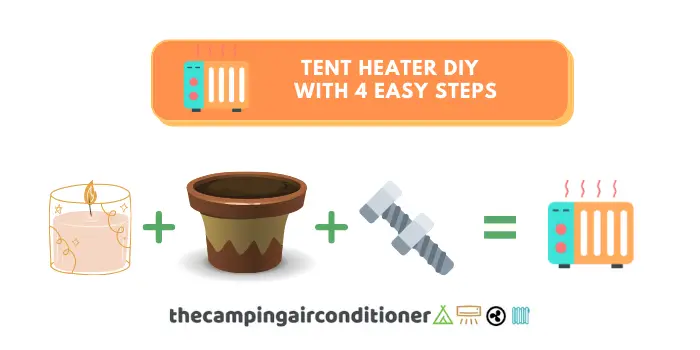
Here are the four steps you need to make a DIY candle tent heater (see the detailed step-by-step below): 

  • Step 1: Assemble the clay pot structure
  • Step 2: Thread the bolt through the bracket and make a handle
  • Step 3: Create a base using bricks, cement blocks, or glass pans 
  • Step 4: Light the Candle – Surround the candles with three mason jars or non-inflammable items 

Before going through our detailed guide to make your candle tent heater, let’s understand how it works.

How does a DIY Candle tent heater work?

A candle heater is a device that enhances scent distribution throughout a room or space without using an open flame. Generally, it is an economical and improvised cold weather survivalism solution loved by campers and outdoor lovers.


So, how does a candle that uses so little flame produce noticeable heat for
an ample space? 
The secret is how the heat from the candles is absorbed into the pots and transferred evenly to the room. First, the candles heat the air in the pot, trapping the warmth inside.


Then, if you opt for a double-pot setup, the warm air trapped inside warms up the pot
plus the bolt on the inside. It works as a heat battery, keeping the warm energy and radiating the heat closer to the ground instead of letting it float up to the ceiling.

Candle DIY Tent Heater - detailed step-by-step

Below, we detail the required materials and steps you need to build this tent heater.

Candle Heater - What material do you need?

To build your candle tent heater, you won’t require many materials. You will need the following materials: 

  • Tea light candles
  • 2 different sized clay planting pots (if you opt to use two pots, one pot should be smaller than the other so it can rest inside the larger pot)
  • Cement blocks, bricks, glass pans, or muffin tin to act as a steady base. 
  • 1 large bolt, washers, or bolts (approximately 5-inches) if you choose the two-pot method 

So, let’s build this candle tent heater. 

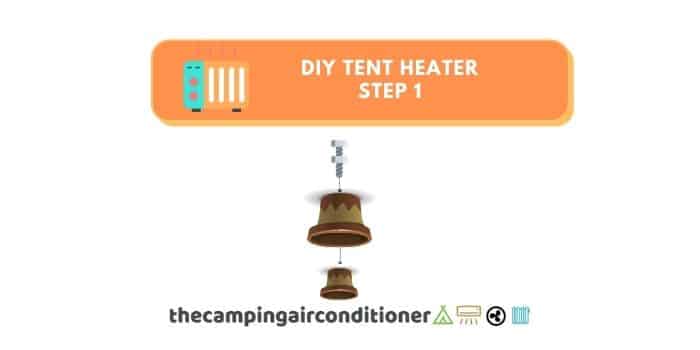
Step 1 - Thread the bolt through the bracket and make a handle

First, you need to assemble the heater structure. The required items include the small pot, screw rod, toggle bolt, round washer, and square washer. 

Start by drilling a hole in the bottom of the pot and inserting a round washer, followed by a square washer. Considering the double-pot setup, push the screw rod inside the clay pot. On the outside of the pot, attach the toggle bolt.

There is another washer to be added to the screw in the opposite direction (inside the bigger pot – see picture below). Next, insert the smaller pot inside the big pot, creating the double-pot structure (use washers to fix both pots).

If you notice a gap around the holes, make sure that you fill them with modelling clay or any other insulating material. This will increase the efficiency of your heater. 

Note: do not tighten it too hard because you can break the pot. 

tent heater diy - step 1

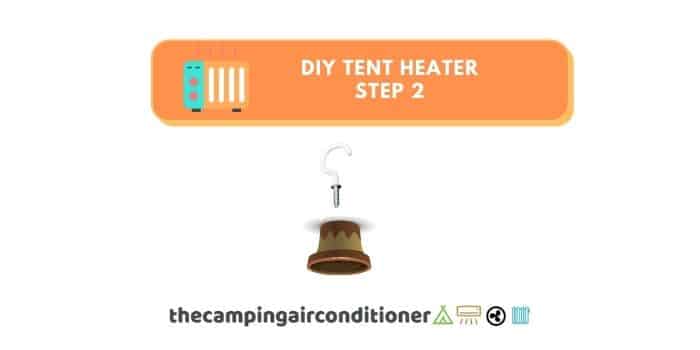
Step 2 - Making a handle with a plant hook.

After setting up the pots, top it off using a plant hook. The hook should be well tightened to the structure and stiff since it will serve as a handle. All you need is to drill a second pilot hole in the pot and screw in the eye hook.

If possible, make sure that the hook has some sort of insulation to avoid overheating and burns (a vinyl-coated option might be a good idea). Now, you are ready to move your heater structure around without much hassle!

diy tent heater - step 2

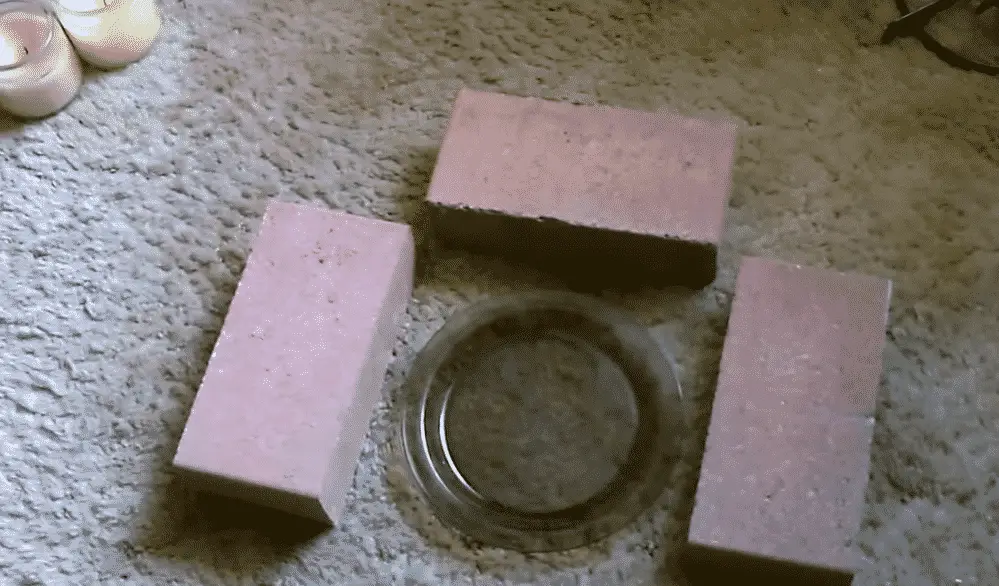
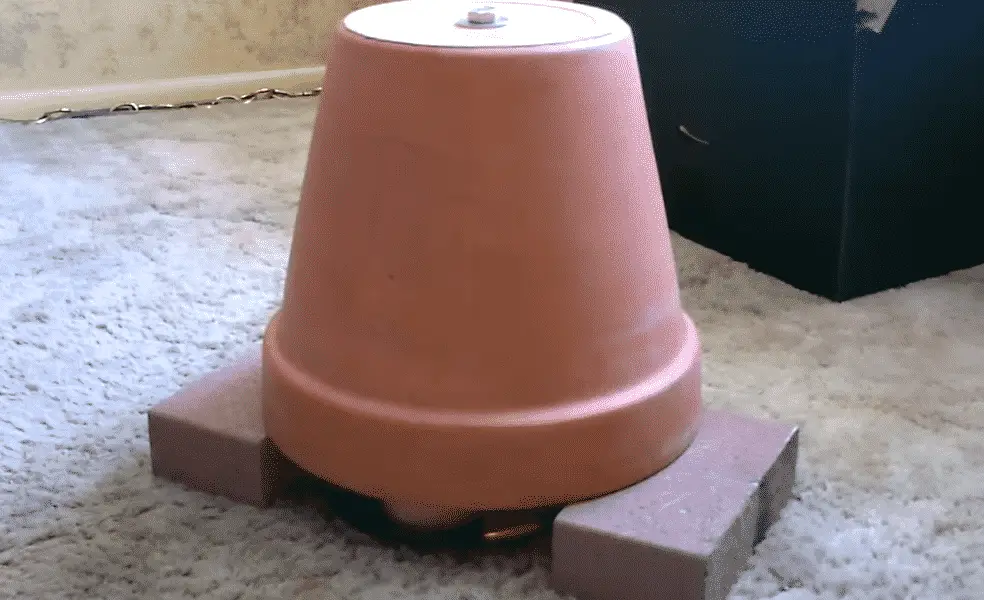
Step 3 - Create a base using bricks, cement blocks, or glass pans

Next, you will need to install cement blocks, glass pans, or bricks to heighten the pot above the candles and leave air intake and circulation gaps. A clay plate in the middle will create a safe surface for the candle to burn efficiently. 


diy tent heater clay pot base
diy tent heater clay pot over the base


You should allow more than enough space in the front to insert and remove the candle when the need arises. In addition, you can add another brick or cement block in the front to contain the heat while the candle is lit. Other than allowing circulation, the blocks on the base provide a reliable and sturdy base for the candle tent heater.

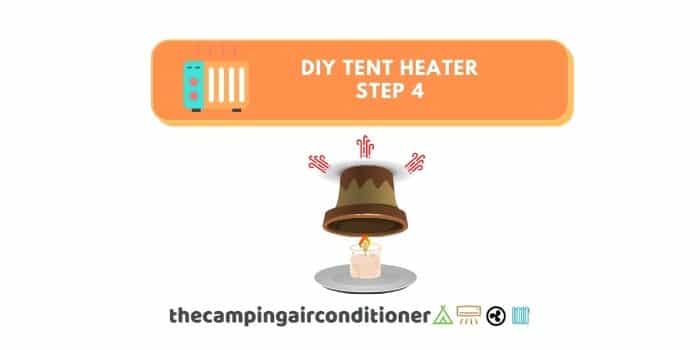
Step 4 - Light the Candle and enjoy the heat!

You can now light them up after you are done with the setup and create a good elevation for the candles. You can surround the candles with large bricks, cement blocks, mason jars, or other fire-resistant items that will act as the stand to keep the pots in position.

Ensure the pots are upside down, and there should be no leak where heat can escape through, and… You are done! 

diy tent heater - step 4

Before the heater feels warm to the touch, it will take a few minutes. The inner pot heats first and retains heat before distributing it to the outer pot.

A single candle will heat up well, but it will be better if you get a glass jar candle with two or three wicks. You also have to be very careful because any mistake can lead to a fire. 

Ensure that the materials are non-flammable (except for the candles) and placed on a fire-resistant surface.

DIY Heater - Step-by-step video (similar approach)

This YouTube video shows a similar step-by-step approach.

FAQ

Is it safe to use this DIY tent heater in a tent?

Yes, using a DIY candle heater in a tent is safe. You only have to ensure that you have placed the base on a non-flammable surface to prevent a fire. 

Furthermore, all the other materials should be fire-resistant and safe to use. If you decide to use 3 candles, expect each candle to heat a small tent about 2-degrees or 4-degrees F.

Make sure your tent is well ventilated to allow some heat to escape and prevent poisoning and overheating.

Are there risks involved when using a DIY candle heater in a tent?

Generally, there are many risks involved if you don’t observe the safety measures required. First, it can lead to a fire if left unattended for long.

Hence, you must keep an eye on it whether you are using it in a tent or at home. Make sure you place it over a non-combustible surface and avoid placing it over or near carpet, magazines, walls, or flammable materials.

Have a  camping fire extinguisher nearby and ensure you know how to use it.

The other problem you can encounter is carbon monoxide poisoning. If the candle heater is enclosed in a small tent with no ventilation, you are at risk of carbon monoxide poisoning (with candle heaters, this risk is minimal though). So, make sure your tent is well ventilated and use a carbon monoxide detector. 

How efficient is a DIY candle tent heater?

The candle heater is an efficient alternative. Referring to this video on YouTube, the heater reaches a maximum of 165-degrees F. The heat produced is more than enough to keep your tent cozy, mainly if you love winter camping

Furthermore, the pots retain the heat for long, offering warmth even after the candles go off.

How long can the candles last?

The longevity of the candles will depend on their size and how well your tent is ventilated. The more ventilated your tent is, the faster and evenly the candles will burn while heating the pots to give the warmth required. Moreover, the bigger the size of candles, the longer they will burn.

What are the options for a DIY candle heater?

We all have different tastes and opinions. Some will like this DIY yourself heater, while others will not. 

Luckily, there are other heater options in the market. In that case, you can for multiple options in the market. Before buying your device, have a look our article on what size (btu) you heater should be

Overall, we recommend the following checking the size of your tent and the desired temperature increase (check table below).

tent heater size BTU

Best option for small tents with low temperature increase needs – Mr Heater F215100 (Little Buddy) – 3500 Btu (Green area)

Best medium to large tents with moderate temperature increase needs – Mr Heater 232000 MH9BX Buddy – 4000 to 9000 Btu (yellow area)

Best option for over-sized tents with significant temperature increase need – Bluu  20,000 BTU Heater (red area)

How can I heat my tent without electricity?

We have prepared 10 tips to heat your tent without electricity in another post (click here). 

Suggested Article

Conclusion

Camping is a good summer activity loved by many until the temperatures start dropping. If you are brave enough to head out during the winter, you will need something to keep your tent warm.

There are many safe methods to heat a tent you can try. If you are on a budget or you want to try other alternatives to heating a camping tent, a DIY candle heater will keep you warm.

Other than using it outdoors, a DIY candle heater can be used at home to save you when the power systems are not working. It is environmentally friendly, efficient, and cost-effective. 

Happy winter camping!

Icybreeze v2 pro – A versatile camping AC!

How cool would it be if you could have an ice chest that also works as a portable AC for camping? What if we told you that a product could do this?

Yes, Icebreeze has created a fantastic versatile product that is both a cooler and air conditioner – IceBreeze V2 Pro Portable Air Conditioner & Cooler.

The product is excellent, and it is a perfect match for campers who are looking for mobility and versatility. Further, Icebreeze V2 Pro is powered by batteries that can run up to 4 hours, making it a perfect air for those who do not have electrical hookups around their tent.

Let’s go through a detailed review below. 

By the way, The Camping Air Conditioner is sponsored by readers. When you buy through one of our links, we may earn an affiliate commission at no extra cost to you.

IcyBreeze V2 Pro - Summary Review

Even though IceBreeze V2 Pro does not have a condenser and a compressor unit, it works extremely well to cool your small or medium-sized tent.

It comes with a group of fans that blows cold air from the inside of the ice chest and can decrease the environment temperature by up to 35 degrees.

You can also use it to store beer and food, making it a multi-purpose camping gear. The investment is moderate ($350 approximately) and provides a good value for money.

The downside of this device, in our opinion, is the need for ice to operate (since it blows the cold air inside the chest) and relative short autonomy (up to 4 hours running from the battery, but you can connect to an alternative 12v battery or buy extra batteries from Icebreeze).

It is an excellent alternative if you have a small solar-powered generator or electric hookups available at your campsite.

Features IceBreeze V2 Pro
Weight 7.25kg (empty)
Dimensions 47cm x 28.57cm x 28cm
BTU N/A – Cooler Fan
Power Consumption 45 W
Battery Voltage Yes – 12V (Additional power supply for 110V)
Battery Operated? Yes
Noise Levels Max 45db
Which Tent size? Small to Medium
Investment $$  (Approx. 350 USD)
Pros
  • Great cooler for mid-sized tents
  • Battery-powered device
  • Heavy-duty 
  • Multi-functional (AC/ice chest)
  • No chemicals in the cooling process. 
  • Low power consumption
Cons
  • Battery lasts up to 4 hours
  • You still need ice to make it work
  • Not suitable for large tents
IcyBreeze V2 Pro
  • 6AH Lithium Ion Rechargeable Battery and Battery Charger included.
  • Optional accessories: 110v Power Supply, Additional Batteries, Corded Remote, & More!
  • Quick detach battery powers the IcyBreeze v2 up to 4 hours.
  • Blows air up to 35 degrees below the environment temperature

IcyBreeze V2 Pro - Detailed Review

Dimensions, Design and Specs

The equipment is compact and and its interior measures 18.5″ x 11.25″ x 11″ (47cm x 28.57cm x 28cm), which ensures portability and ease of storage. The device can hold up to 30lbs of ice and weights only 24lbs (dry weight), making it lightweight and ideal for small to medium-sized tents.

Manufactured with special polyethylene, this ice chest has wheels and dual lift handles that make it easy to carry around and position in your preferred position. It has thick walls, delivering excellent insulation for cooling functions.

Icebreeze V2 Pro comes in three different colours that you can choose according to you preference:

  • Desert Tan
  • Iceberg Blue (our preferred!)
  • Molten Red 

Power input and Rechargeable battery

The equipment runs from a rechargeable 6AH battery with quick detaching mechanisms that supply power to the IceBreeze V2 for up to 4 hours (4 hours in the low consumption mode, 2.5 hours on medium, and 1.5 hours on the high).

The battery is made of lithium, which among many other benefits, ensures reduced weight, greater user capacity, more power, longer lifespan, and faster charges.

In our opinion, this is Icebreeze‘s outstanding feature since it gives campers maximum flexibility and extinguishes the need for having an electrical hookup close to your tent.

If you are camping in remote locations or with no electrical infrastructure around you, you can use a portable camping battery to charge it. Its nominal voltage is 12V, making it easy to connect with portable batteries.

Recommendation - Other products - Camping Battery

If you plan to camp in remote locations with Icebreeze, we recommend having a solar powered camping battery Jackery Portable Power Station 500 is our recommendation to run with Icebreeze

Operational aspects

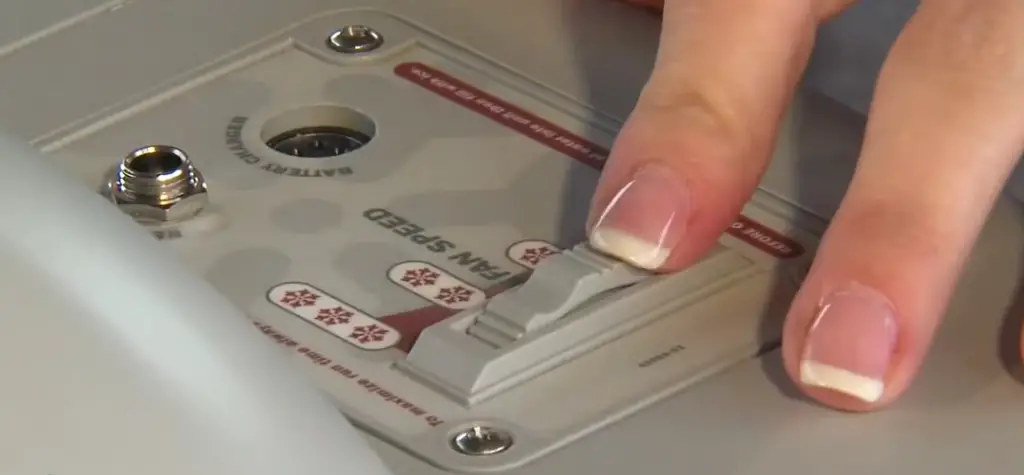
The equipment is safe and extremely easy to operate. It has an user friendly control menu, very intutiive and easy to operate. 


icybreeze-v2-pro-tent-air-conditioner-panel

You can set up your desired fan speed between low, medium and high ventilation levels and control the desired cooling power. Its flexible hose lets you control the direction of the breeze.

Icebreeze cools the air using a radiator system, with no humidity added. According to the manufacturer, it can blow air up to 35 degrees below the ambient temperature.

The equipment is strongly sealed, and there are no water leaks. When you finish using IceBreeze, you need to drain the water and clean it inside. 

icybreeze-v2-pro-drain
IcyBreeze V2 Pro
  • 6AH Lithium Ion Rechargeable Battery and Battery Charger included.
  • Optional accessories: 110v Power Supply, Additional Batteries, Corded Remote, & More!
  • Quick detach battery powers the IcyBreeze v2 up to 4 hours.
  • Blows air up to 35 degrees below the environment temperature

Alternatives to IceBreeze V2 Pro

If you have a small tent or a family-sized tents, we recommend checking other models, such as (detailed in the comparison table below): 

Features 1) Evapolar Evachill 2) IceBreeze V2 Pro 3) BLACK+DECKER 8,000 BTU Portable AC
Weight 0.910kg 7.25kg (empty) 23kg
Dimensions 6.5 x 6.5 x 6.5 inches 18.5  x 11.25 x 11 inches 17.32 x 13.2 x 27.2 inches
BTU N/A – Evaporative Cooler N/A – Cooler Fan 8000 Btu
Wattage 7W 45 W 860W
Battery Compatible? Yes – 5V Yes – 12V No
Battery Operated? No Yes No
USB compatible? Yes No No
Noise Levels Max 50 dB Max 45db 52dB
Tent size? Small Medium Family-sized tents
Investment $ $$ $$$
Ideal for small tents
Evapolar evaCHILL
Ideal for Medium Sized Tents
IcyBreeze V2 Pro
Ideal for family tents
BLACK+DECKER 8,000 BTU

FAQ

How long does IceBreeze V2 Pro work?

The device was designed to work smoothly and with optimal performance. It can work up to 4 hours without recharging its battery, but you can buy extra batteries. 

How Loud is IceBreeze?

According to its manufacturer, the equipment produces 60dB while operating, which is the same noise level of a window mounted AC. 

Can I use IceBreeze as a cooler?

Combined with the battery-powered function, the multifunctionality of Icebreeze  is our preferred feature. While not using it as an AC, you can simply put ice on it and cool your drink or food.

Are there other battery-powered camping ac options?

Yes, there are. We have reviewed other four options in one of our posts – battery-powered tent air conditioner options. 

Is it safe to use IceBreeze in my tent?

Yes, there are no problems. The equipment uses a ec0-friendly cooling system and does not require any electrical connections. 

How long will the ice inside the chest last for?

It depends – different weather conditions will make the ice insde the check last longer or shorter. Overall, we have seen records of people saying that ice lasted from 2 to 5 hours. 

How can I make the ice last longer?

IceBreeze V2 Pro - Verdict

Icebreeze brings a unique offer to the market, combining an ice chest and air conditioning features. It provides you with a cost-effective solution for camping ac and comes with valuable characteristics for a camper:

  • Portability
  •  Battery operated solution
  • Lightweight
  • Low energy consumption
  • Ease to operate
  • Multi-functional (ac / cooler)

The downside of the equipment is its battery, which might not last the whole night (battery runs up to 4 hours) and the need for ice to work properly. 

 Apart from that, we loved the equipment, and we highly advise you to consider Icebreeze for your next summer camping trip.  

IcyBreeze V2 Pro
  • 6AH Lithium Ion Rechargeable Battery and Battery Charger included.
  • Optional accessories: 110v Power Supply, Additional Batteries, Corded Remote, & More!
  • Quick detach battery powers the IcyBreeze v2 up to 4 hours.
  • Blows air up to 35 degrees below the environment temperature

How many BTU do I need for a tent heater?

With so many models of heaters in the market, it is normal to get confused and ask yourself – How many BTU do I need for a tent heater?

Even though the exact answer will vary depending on your tent shape, insulation, area, desired temperature change, etc., we have found a rule of thumb that might help you calculate the ideal size for your heater.

The formula is straightforward, and you will only need the following information: 

  • Tent Size – volume (area x height in cubic feet)
  • Desired temperature increase (in Fahrenheit degrees)

 (Temperature Increase) x (Tent Volume) x 0.25 = BTUs heater output. 

Let’s go into detail with the calculations below, with an example. 

which size should my tent heater be

How to calculate my tent volume?

The calculations are elementary. You need to get your floor area and multiply for the tent’s height. As an example, let’s use the CORE 12-person cabin model. 

Its dimensions are:

  • Floor size – 11 feet x 16 feet –> Floor Area = 176 square feet
  • Height – 86 inch (1 inch = 0.083 foot) = 7.16 feet

The tent’s volume is calculated according to formula below and it is 1,260.16 cubic feet

 Tent Volume = Tent Floor Area x Height 

What is the desired temperature increase?

The temperature increase is a personal choice, but let’s assume that you are camping with temperatures of 40 Fahrenheit and would love to sleep with a temperature of 65° F (according to Cleveland Clinic, the best temperature to sleep ranges between 60 and 67° F).

Therefore, the required temperature increase required is 25° F (65° F – 40 ° F). You can check the temperature and weather forecast in your campsite with accuweather.com.

Desired Temperature Increase = Desired Temperature x Existing Temperature

Required Heater Output

Using the first formula shown in this article, we will find that the required heater output in BTUs is approximately 7,876 BTU per hour. 

 (Temperature Increase) x (Tent Volume) x .25 = BTUs heater output. 

 25 ° F x 1260.16 Cubic Feet  x 0.25 = 7,876 BTU per hour

In this case, we would recommend Mr Heater 232000 MH9BX Budd, which provides from 4,000 to 9,000 BTU per hour.

Tent Heater Output x Tent Size

Considering the calculations above, we further investigated which tent heater model will suit different tent sizes. Our calculations are based on some premises using existing products in the market, as shown below:

Dimensions:

82.7” x 82. 7” x 47.2”

 (6.88 ft x 6.88 ft x 3.93 ft)

Volume (cubic feet):

186.6 cubic feet

Dimensions:

9 ft x 7 ft x 4ft 11” 

(9 ft x 7 ft x 4.91 ft’)


Volume (cubic feet):

309.72 cubic feet

Dimensions:

16 ft x 9 ft x 6ft 2” 

(16 ft x 7 ft x 6.16 ft’)


Volume (cubic feet):

690.65 cubic feet

Dimensions:

11 ft x 16 ft x 7.16ft


Volume (cubic feet):

1260.16 cubic feet

Reviewing these models, we established the following metrics for each standard size:

  • Small tents have approximately 200 cubic feet
  • Medium tents have approximately 350 cubic feet
  • Large tents have approximately 700 cubic feet
  • Family Tents have approximately 1250 cubic feet

We stipulated different temperature increases to calculate the amount of BTUs required and sumarised our finds in the table below. 

tent heater size BTU

With these calculations, we recommend the following heaters:

Best option for small tents with low temperature increase needs – Mr Heater F215100 (Little Buddy) – 3500 Btu (Green area)

Best medium to large tents with moderate temperature increase needs – Mr Heater 232000 MH9BX Buddy – 4000 to 9000 Btu (yellow area)

Best option for over-sized tents with significant temperature increase need – Bluu  20,000 BTU Heater (red area)

Note: All these calculations are indicative only.

FAQ

What is BTU?

BTU stands for British Thermal Unit. One BTU is the amount of energy required to increase the temperature of one pound of water by 1° F.

What tent heater is the best?

Overall, our pick is Mr Heater 232000 MH9BX Buddy . It offers great flexibility since you can operate it at different heating output levels. 

How cold is too cold for camping?

In short, there are records of professional camping in temperatures as low as -70F.  However, for normal campers, temperatures between 30 to 40 ° F are already considered cold, with a lower threshold of 0°F for experencied campers.

Suggested Article

Is it safe to use a heater inside my tent?

Yes, there are no problems as long as you follow some safety instructions, such as:

  • Monitor carbon monoxide (CO) levels
  • You heater must have auto-shutoff mechanism for overheating and tip-over incidents

Is it safe to sleep with my tent heater turned on?

We do not recommend it. There are CO poisoning and overheating risks that you should avoid. 

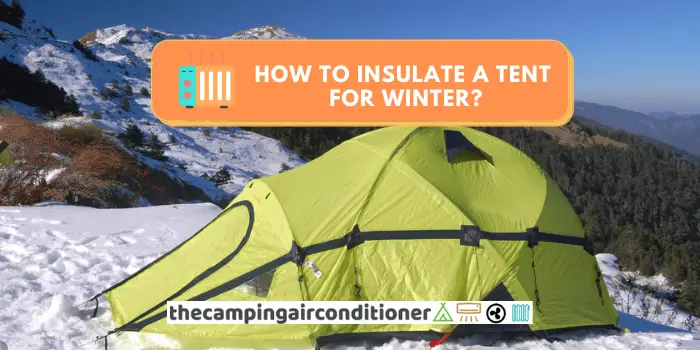
How can I insulate my tent for winter?

Among several measures, we suggest the following:

  • Use insulating foam on your tent walls
  • Insulating your tent floor
  • Using the most suitable tent (choose the right tent fabric and model)
  • Pick smaller tents
  • Pitching your tent in areas with limited wind exposure
  • Using a tent heater
  • Using a suitable sleeping bag

If you want to know more about it, read our detailed article below.

Conclusion

We prepared this article to help you select the appropriate size for your tent heater. In summary, you will need the following information:

  • Tent Size – volume (area x height in cubic feet)
  • Desired temperature increase (in Fahrenheit degrees)

Bear in mind that these calculations are indicative only, and the perfect answer will depend on weather conditions, tent insulation measures, and many other factors.

Happy camping! 

Best tents for hot weather – 8 options to keep you cool!

Tents have different materials, shapes, sizes, weights, coatings, and many other factors that might affect their suitability for you. With a wide variety of options available in the market, we understand that you might get confused when choosing the best tent for hot weather. 

Thinking of that, we prepared this guide for you. After a thorough and extended review, we concluded that the best tents for hot weather are (keep reading below for a detailed review of each product):

Best Tent for hot weather - product reviews

Best option for family camping - Core 12 Person Extra Large Cabin Tent

This is a spacious 12-person tent with a 16″ x 11″ floor space and a centre height of 86 inches. It features an extra-large wall straight wall that allows everyone to stand, stretch, and move comfortably in the tent.

CORE 12-person cabin tent has a waterproof rainfly which is removable to expose the mesh ceiling for amazing views.

It features an advanced venting system that uses adjustable air intake vents designed to draw in air from the ground while the mesh ceiling escapes the hot air, keeping your tent cool in the summer. 

In addition, this tent option hot weather has front and back doors that make it simple to share the tent. You can use the front pull pane door for protection or the back-side D-door for simple access.

Pros

  • The tent is weather-resistant
  • It has extra-large interior space for the whole family
  • Spacious enough to fit 4-queen size air mattresses

Cons

  • It takes time to assemble.

Best canvas tent option (4,6, and 8 people)

If you are looking for a quality tent that can fit 4 to 8 people,  Kodiak Canvas Tent Delux is one of the best options for summer camping.

It has large triangular windows on both ends and an extra window that offers additional ventilation and openness for views. This tent has stainless steel wire stake loops that give superior warmth and performance. 

It is a spacious tent with a 6.1″ ceiling height that provides walk-around comfort, plus it has two D-shaped doors that offer simple access to the tent. This tent features a customizable gear loft and organizer pockets to store all essentials.

Pros

  • The tent is weather-resistant
  • It has extra-large interior space for the whole family
  • Spacious enough to fit 4-queen size air mattresses
  • Canvas has excellent breathability

Cons

  • Not fully waterproof
  • The vinyl floor has a strong smell.

Best option for backpackers and hikers

Hyke and Byke Zion Hiking & Backpacking is available in 1-person and 2-person versions, and it is the best tent for backpackers and hikers to enjoy all outdoor adventures. 

It is built to be light sturdy enough to withstand all weather conditions. It packs into a compact 16.5″ x 5.5″ carrying bag, making it a suitable addition to your backpacking gear.

The tent has ventilation vents that allow maximum air circulation to keep the tent cool while keeping bugs out.

It won’t take you much time when it comes to assembly because it comes with everything you need for the job. The package has aluminium tent stakes, a removable gear lot, footprint floor cover, stake press, and reflective guy lines.

Pros

  • It comes with a spacious bag for carrying and storage
  • The tent is spacious and versatile
  • It keeps you safe from harsh weather conditions in summer
  • Great tent for the price

Cons

  • The floor material is thin and fragile
  • It is hard to get the contents back in the carrying bag.

Best Budget-Friendly option 

Coleman Sundome  is a long-lasting camping tent that can accommodate up to 4 individuals while still leaving space to stay comfortable.

This tent is suitable for camping in hot weather because it has large windows facilitating ventilation. Besides, the tent includes a ground vent that pushes warm air up and out to you comfortable even when it is scorching. 

It includes a waterproof rainfly, welded corners, and inverted seams that prevent water from coming in, keeping you protected. The tent has a heavy-duty frame designed to keep the tent stable in all weather conditions. You won’t require much time when it comes to setup because it comes with everything you need.

Many campers love the Coleman Sundome tent because it has an affordable price that will suit any budget.

Pros

  • The tent is easy and fast to assemble
  • Good tent for any camper on a budget
  • Fitted with large windows and ground vent for ventilation

Cons

  • Nothing to report at the moment.

Best lightweight option (1-person tent)

When you are ready to enjoy beautiful places outdoors, the right tent will make all the difference. The Altos backpacking tent is lightweight but stable enough to handle all types of weather. 

It has a rainfly that can be used as a shelter or sunshade, and it has reinforced anchor points that make the tent durable. The 3-in-1 backpacking tent packs down tight for camping and backpacking as well, and it is ideal for solo travellers.

It packs down to a compact size so that you can carry it anywhere. Its rainfly has vents for maximum airflow, and all the elements will be kept out, thanks to how the side walls are extended up. Overall, if you like camping alone, this is the best tent to purchase because it has ample space for one person.

Pros

  • The 1-person is lightweight and simple to setup
  • It is versatile and long-lasting
  • Well-ventilated to allow for airflow

Cons

  • Not ideal with strong passing wind or storms.

Best pop up tent option for hot weather

When looking for the best tent for hot weather, don’t forget Eackrola 2-person as a pop-up option. Whether you are an occasional holidaymaker, avid camper, or love outdoor activities, the pop-up tent is a must-have.

The pop-up tent will only take seconds to set up, and it is the best option for first-time campers. This tent measures 8.07 x 5.09ft, it has a centre height of 3.44ft, and the interior can accommodate up to 2 individuals.

It weighs 6.6lbs and folds compactly so that you can carry it anywhere and store it in tight spaces. Moreover, it comes with pre-assembled poles that set up the tent in seconds and a portable carrying bag.

Eackrola 2-person tent features two doors that will give you easy access, and it has extra mesh windows that will keep bugs and allow enough airflow. Overall, it is an excellent 1-person tent for hiking, camping, beach, car camping, and other outdoor activities.

Pros

  • The structure is stable
  • It has two doors and mesh for easy access and optimal airflow
  • Heavy-duty enough to tolerate moderate weather conditions

Cons

  • Folding this tent is hard and frustrating
  • Not suitable for taller adults.

Best Option with screen room

The Wenzel 8 Person Klondike Tent is an excellent option for summer camping. Its screen room and mesh on the walls provides maximum air circulation, ensuring optimal climate inside your tent. 

Even though it is a big tent for eight people, one camper can easily set it up. Its screened area is removable, which might be the best option during rainy conditions. Further, it offers extra space for supply storage.

The tent offers plenty of space and has multiple mesh areas around it, ensuring constant fresh airflow inside it. The downside is its durability, which is compromised by fibreglass poles, and weak seams. However it is made of polyester with a polyurethane coating, ensuring excellent waterproofness. 

Pros

  • Plenty of room with mesh areas
  • Great air circulation
  • Easy set up

Cons

  • Overall, we have concerns with its durability

Best option with AC port

Ozark Trail 16×16-Feet 12-Person Instant Tent is a giant instant tent that can easily fit 3 queen airbeds and hold up to 12 people. 

This tent is very easy to set up because of its pre-attached poles. You will only need to unfold and extend them. Everything is set for you to make your camping trip enjoyable.

It comes with two-room dividers, each with an AC port, allowing everyone to relax the tent without compromising privacy. The tent also comes with large mesh windows on the laterals, ensuring optimal ventilation. 

 With a considerable size, Ozark Trail 16×16-Feet 12-Person Instant Tent has two separate doors that allow campers to access the shelter’s interior without disturbing others. 

The tent is made of heavy-duty polyester that can withstand harsh weather conditions, and the doors have sturdy zippers. It has a decent ceiling height of around 80 inches, allowing tall to move inside easily.

Pros

  • Comes with room dividers with 3 separate rooms for privacy
  • Waterproof and durable
  • Spacious with lots of ventilation options
  • Comes with AC ports 

Cons

  • It is a cabin tent and, therefore, it is not the best options for windy conditions. 

Items you should consider before choosing your tent for hot weater

Some features that you should consider when looking for your summer camping tent are:

  • Dimensions – Overall, the bigger the tent, the better. More space will facilitate air circulation.
  • The number of openings – Check how many openings your preferred option has. Ideally, you would pick an option with lateral windows to ensure a fresh breeze. 
  • Fabric – Tents are made of different materials, such as nylon, polyester, canvas, polycotton, cuben-fibre, etc. Generally speaking, Canvas tents offer greater breathability and lower heat retention. 
  • Size and Weight – Even though there is no direct relationship between the weight of your tent and its ability to deal with hot weather, you should always consider mobility and portability as essential items for your research. 

How to cool down your tent without an AC?

We have prepared a detailed article on how to cool down your tent without electricity. Simple measures that can help you are:

  • Choose the adequate tent fabric.
  • Choose the best location to pitch your tent
  • Set your tent up at the right time
  • Use battery and solar-powered devices
  • Use a reflective blanket.
  • Cool your body down
  • Watch for tent ventilation.
  • Forget about your sleeping bag.

FAQ

What is the best tent fabric for hot weather?

Overall, we recommend canvas fabric. This material has better breathability, offer outstanding insulation features, and has low heat retention. From our reviewed products, Kodiak Canvas flex-blow is an excellent alternative. 

If you want to learn about tent fabrics, read our article on what tents are made of. 

What color tent is coolest in hot weather?

We recommend lighter tones, such as white, yellow, light green, and so on. If you want to learn more about picking the best tent color for you, read this article. 

Can I install an AC unit in my tent?

Yes. There are no problems with it. However, we always recommend following safety instructions and ensure that you properly insulate your tent for your ac. 

What is the best tent for tropical weather?

We recommend Eackrola 2/4 person instant pop up tent. It has wide openings that facilitate air circulation and fresh breeze inside your tent. 

What is the best option for backpacking and hiking?

We recommend Eackrola 2/4 person instant pop up tent , Hyke & Byke Zion Hiking & Backpacking Tent, and Hyke & Byke Zion Hiking & Backpacking Tent. These are compact options that offer flexibility for outdoors adventures in small groups. 

Conclusion

We hope that the information above helped you to choose your next tent for summer camping. Each camper will require different tent features and we tried to cover multiple requirements. 

To summarise, in our opinion, the best tents for hot weather are:

If you have any doubts or suggestions, please do not hesitate to contact us